-
- Overview
-
- Coming soon
-
- Coming soon
- Knight Guide
Knight Guide
This guide has not been translated to 한국어 and therefore we show you the English Version.
Knight Guide
Knight Overview
Knight is a strong front-line class. It can level safely, farm many monsters, survive hard fights, and stay useful in PvE and PvP.
Knight has three main playstyles:
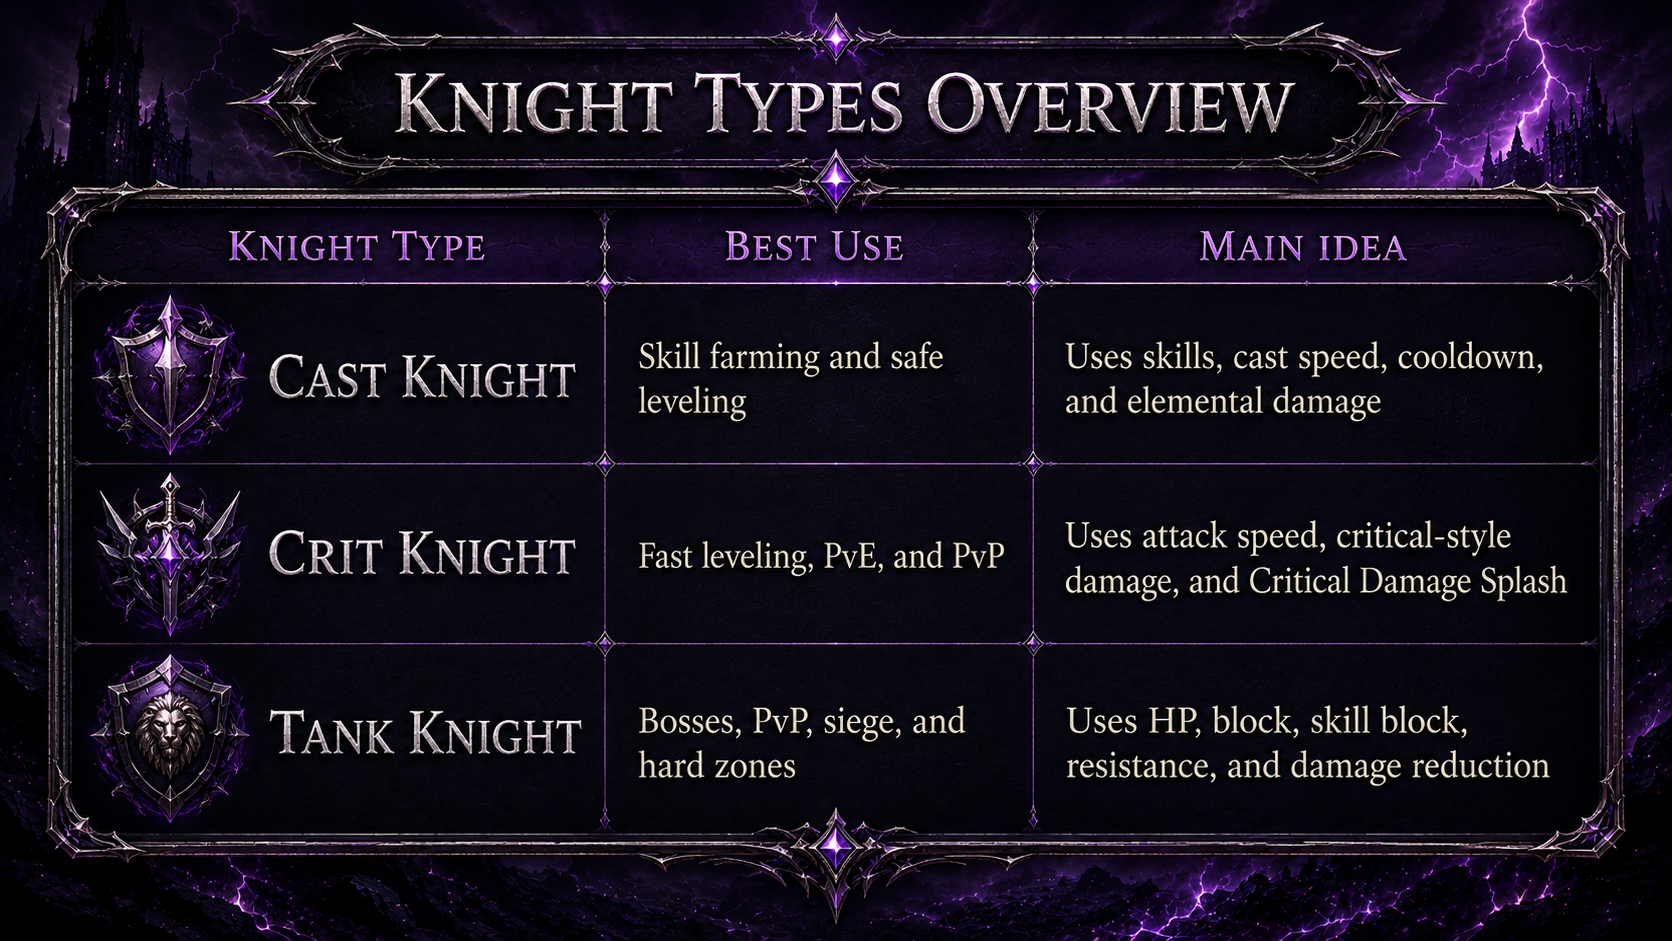
Important: Cast Knight is not the only leveling option.
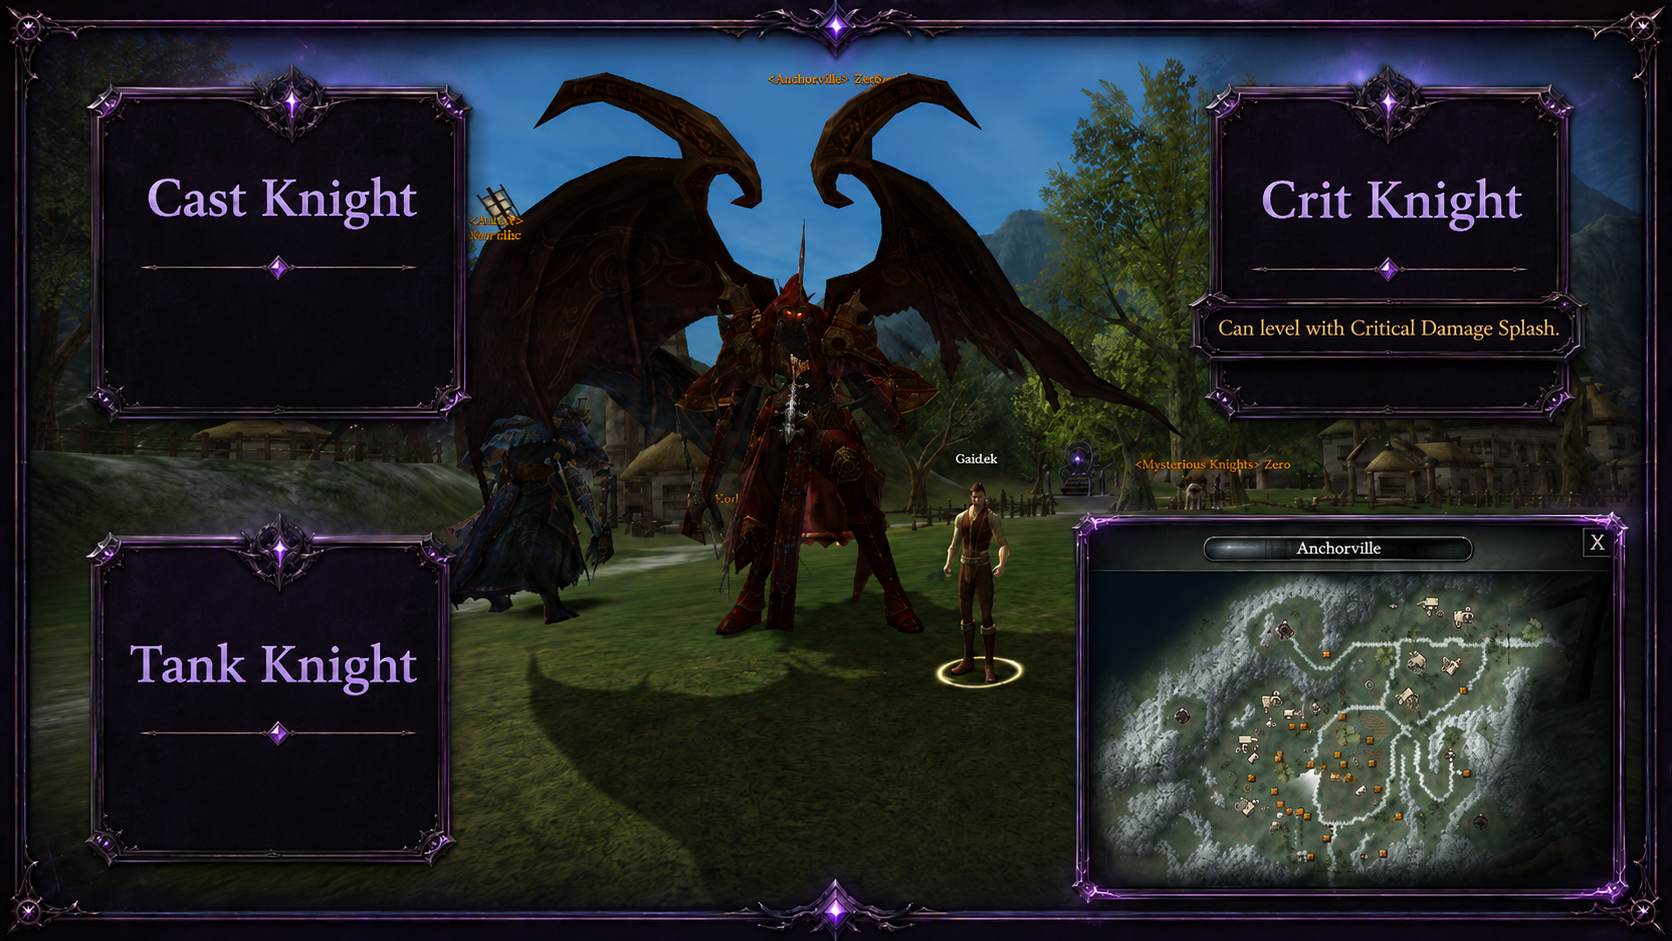
Crit Knight can also level well because Critical Damage Splash lets critical-style damage work as AoE damage. This makes Crit Knight a strong and comfortable leveling build when your attack speed, damage, and critical setup are ready.
Most new Knights can choose between:
-
Cast leveling if they like skill farming.
-
Crit splash leveling if they like faster physical hits and critical-style farming.
-
Tank setup as a second gear set for bosses, PvP, and hard zones.
First Steps as a Knight
Start in Anchorville
After creating your Knight, you start in Anchorville.
Find the red dragon Event NPC. This NPC gives your level-up rewards. You will come back to this NPC often while leveling.
Claim your first reward and equip all starter armor pieces.
Open your chantra bag with B and activate:
-
Lens Stone+
-
Compound Potion
-
Pet
-
Life Potions
-
Mana Potions
Your pet is important because it picks up drops while you farm.
[Official guide: Level Up Rewards]

Important Beginner Rules
Keep these active while leveling:
|
Item or action |
Why it matters |
|
Lens Stone+ |
Helps your farming damage |
|
Compound Potion |
Gives better damage, faster cast, and lower cooldown |
|
Pet |
Collects drops automatically |
|
Life Potions |
Keeps you alive during pulls |
|
Mana Potions |
Keeps your skills running |
|
Item lock |
Protects important items |
Use Ctrl + Left Click to lock items you do not want to lose.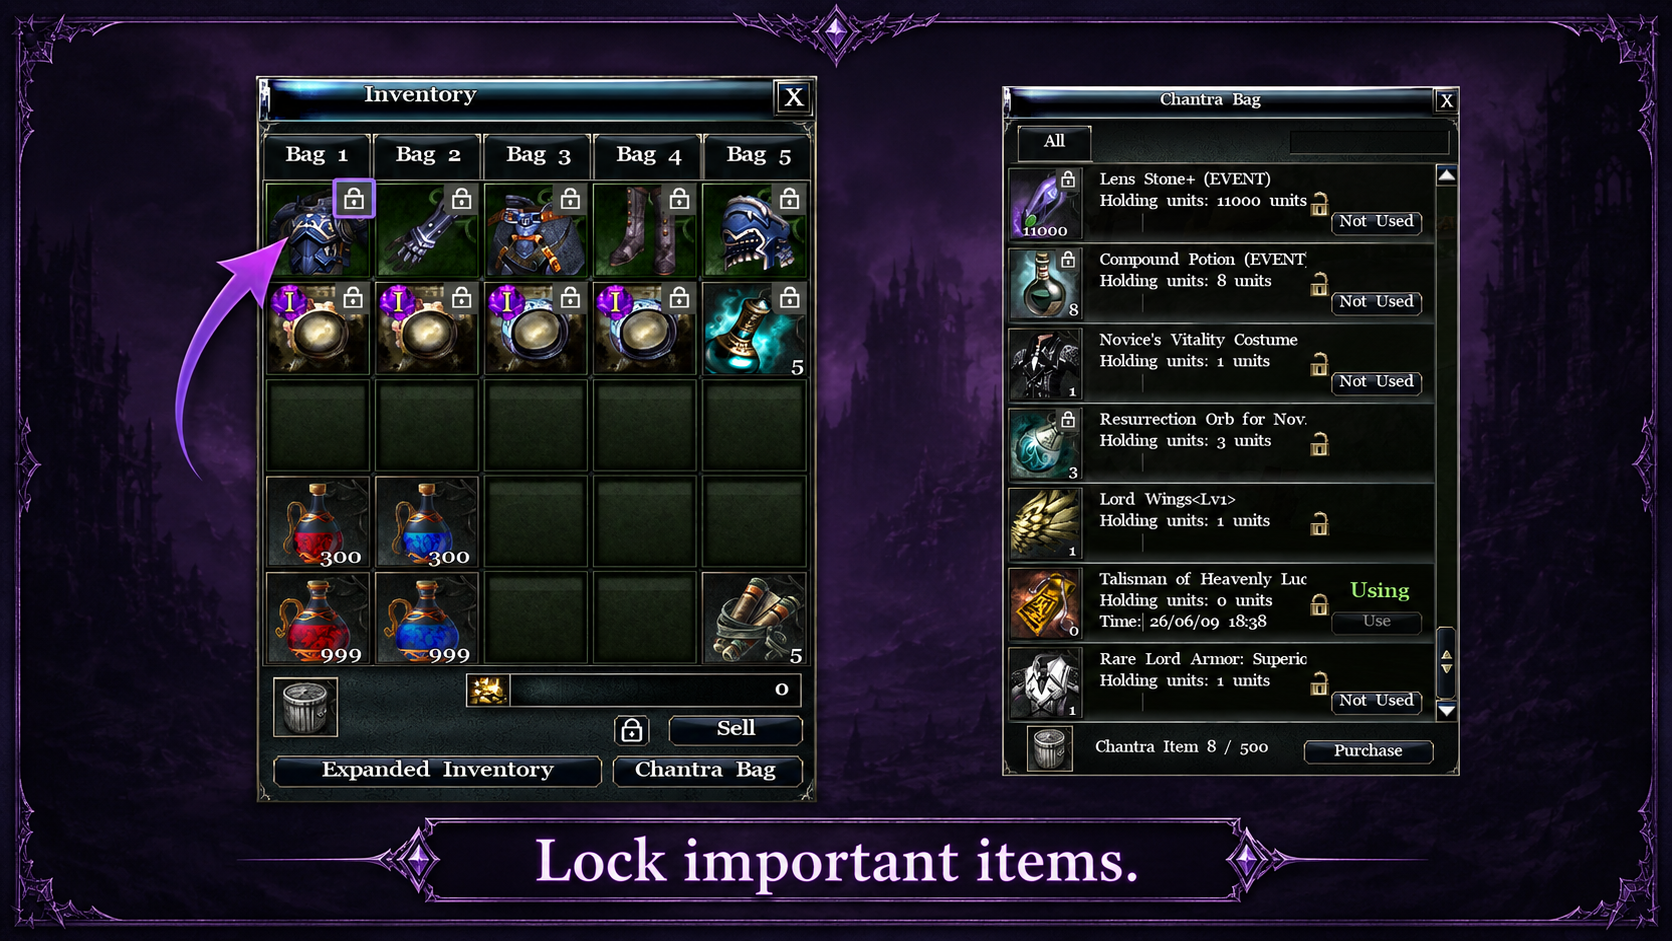
Knight can damage up to 12 monsters at once. This is why both Cast Knight and Crit Knight can farm groups.
You can gain XP from monsters up to 11 levels above or below your level.
Leveling becomes slower after level 71. That is normal. At this point, your weapon, accessories, stones, and buffs matter more.
Which Leveling Build Should You Choose?
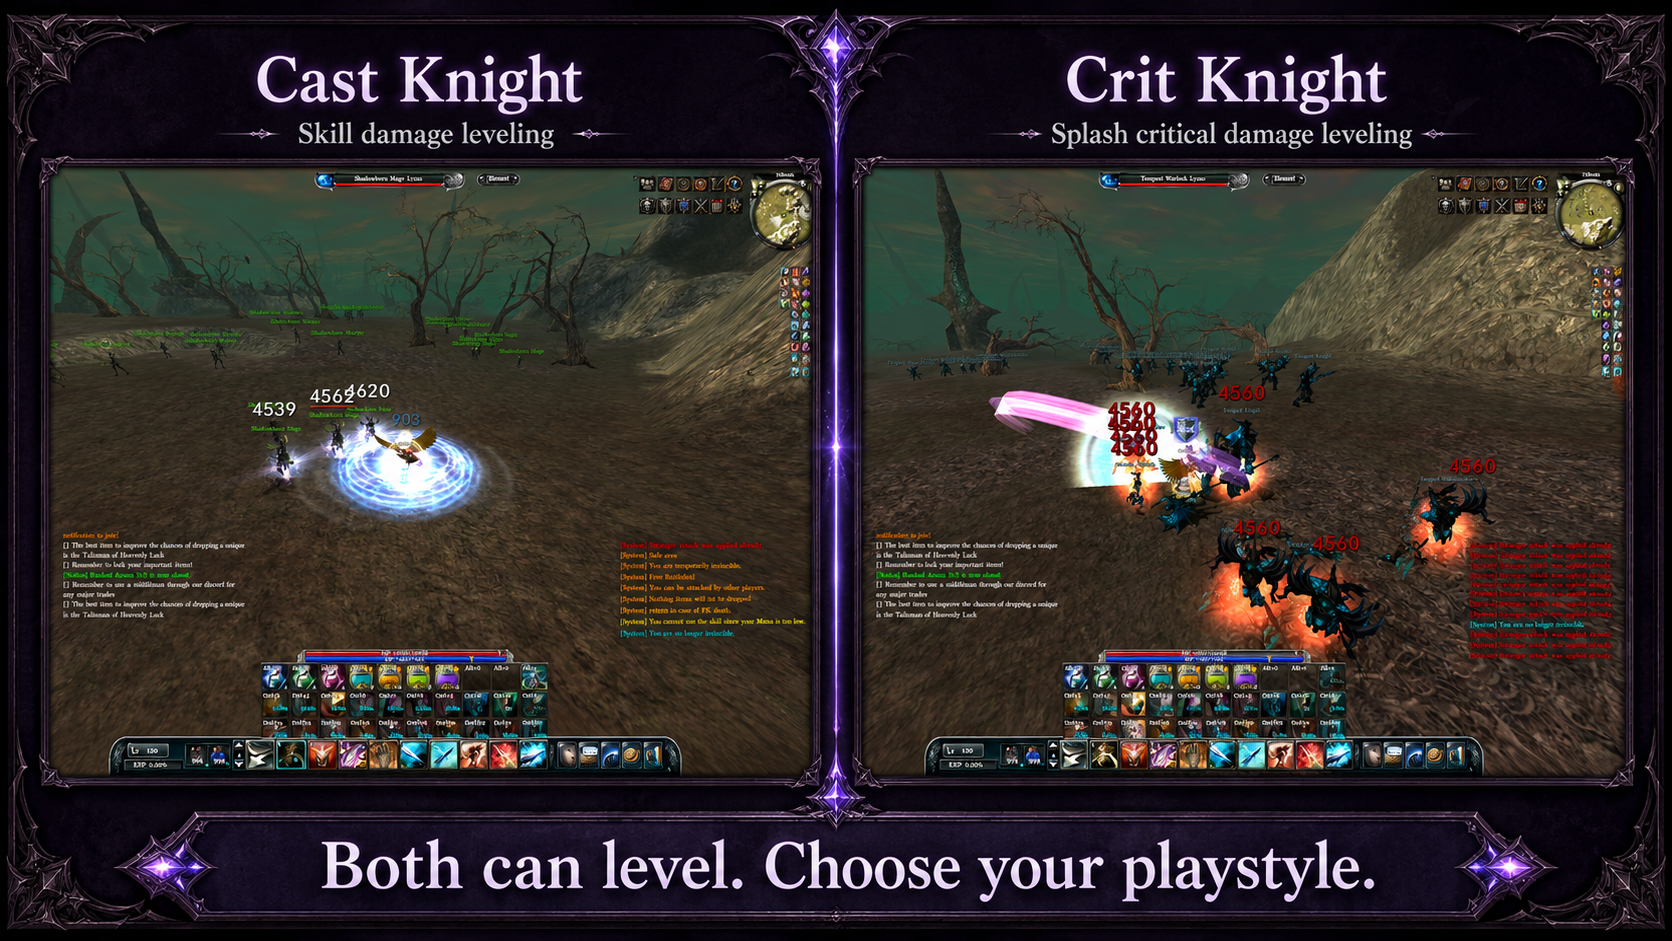
Cast Leveling
Choose Cast Knight if you like using skills.
Cast leveling is good because:
-
Skills hit groups of monsters.
-
Cooldown reduction helps you farm smoothly.
-
Cast speed makes the build feel faster.
-
Elemental damage works well with Cast Knight accessories.
-
It is safe and easy for new players.
Best for:
-
New players
-
Skill farming
-
Safe PvE leveling
-
Players who like active rotations
Crit Splash Leveling
Choose Crit Knight if you like fast physical attacks and critical-style damage.
Crit leveling is good because:
-
Critical Damage Splash gives AoE farming value.
-
Attack speed makes farming feel faster.
-
Glorious rings and necklaces add strong hit effects.
-
It can be faster than Cast Knight when gear is ready.
-
It works for both PvE and PvP with similar build direction.
Best for:
-
Players who like fast hits
-
PvE farming with crit splash
-
PvP-ready leveling path
-
Players who want one build for leveling and fighting
Important: Crit Knight needs better gear support than Cast Knight. If your attack speed, damage, and stones are weak, Cast Knight may feel easier at the start.
Leveling Route
This route works for both Cast Knight and Crit Knight. Your gear decides how fast you can move.

Levels 1 to 11
Start outside Anchorville.
Kill monsters near the city. Move farther from the city when monsters become too easy.
At level 11, unlock Linear Blow.
Linear Blow is useful because it has good range and low cooldown.
Main goal:
-
Equip starter gear
-
Activate pet
-
Use Lens Stone+
-
Use Compound Potion
-
Reach level 11
-
Unlock Linear Blow
Levels 13 to 24
Go from Anchorville to Tullan.
From Tullan, use the portal to go to Kings Bridge.
Enter the first dungeon and farm there. The first monsters are around level 22 to 24, so try to be at least level 13 before farming here.
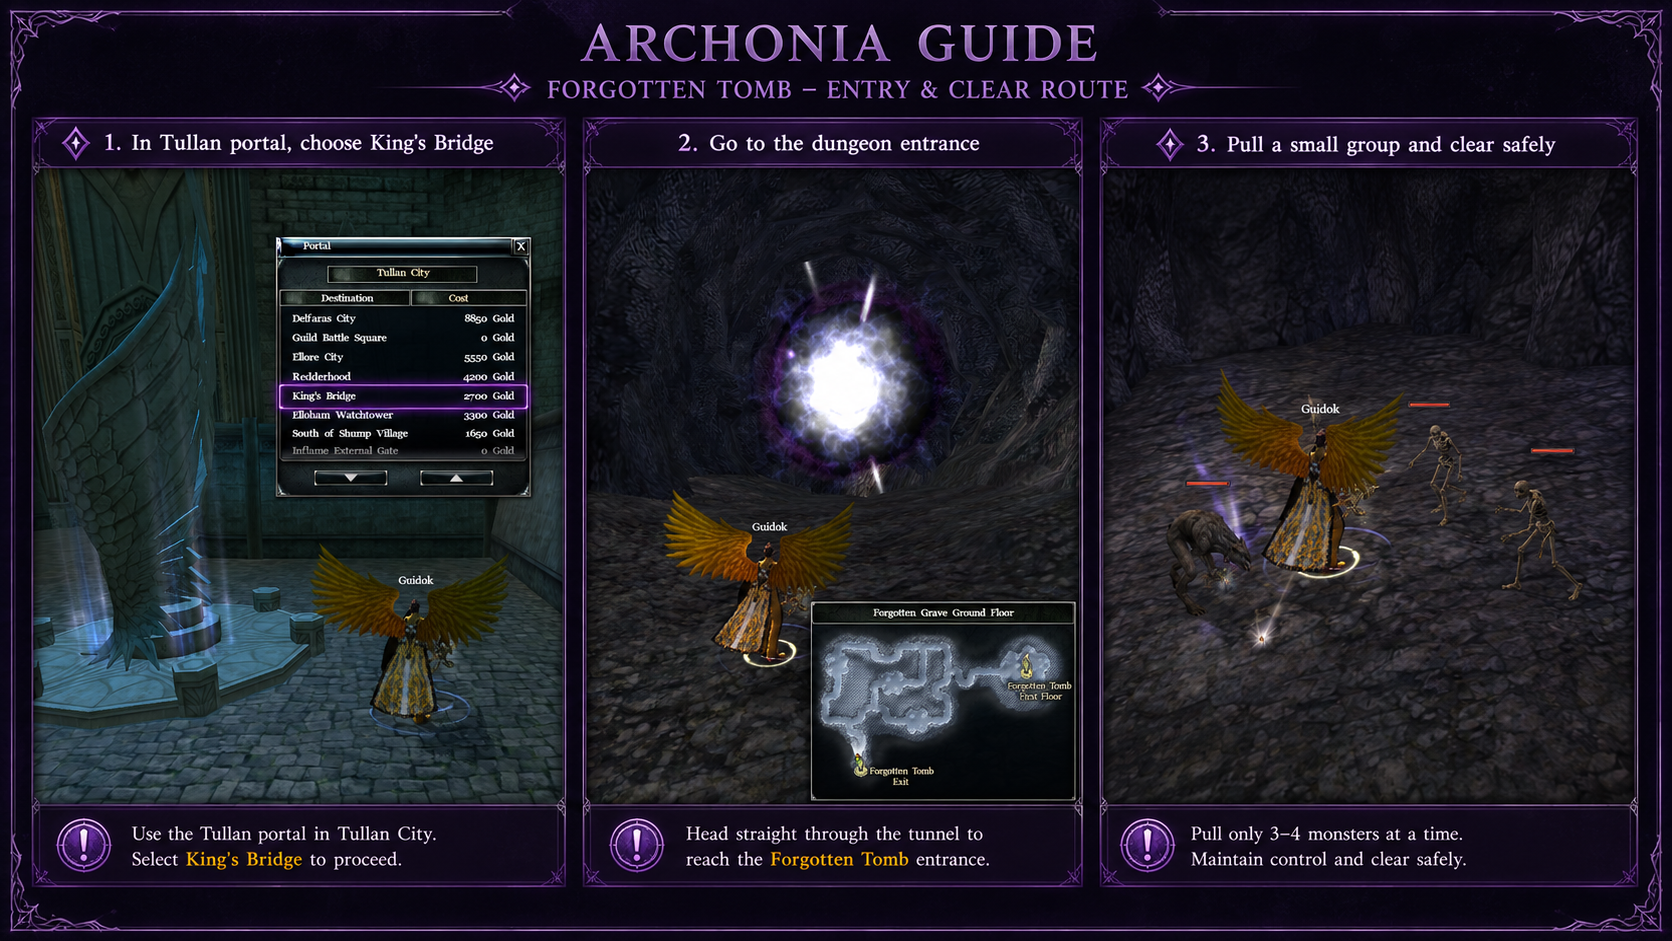
When you reach level 20 to 24, move deeper into the second floor.
Useful reward items:
-
Shuta Ring with Ring Spirit Stone
-
Lens Stone+
-
Compound Potion
-
Life Potions
-
Mana Potions
-
Reinforcement Potions
Knight note:
Shuta Ring is useful early because it gives +1 learned skill rank.
For Cast Knight, use Intelligent Shuta if available.
For Crit Knight, use Glorious Shuta if available.
Levels 31 to 48
From Tullan, teleport to Redderhood.
Enter the second dungeon. The first monsters are around level 40 to 41, so be careful if you come early.
After level 40, move to the second floor and rotate rooms for faster farming.

Useful rewards:
-
Karkaen Necklace with Wings and Cloak
-
Pargon Ring with Ring Spirit Stone
-
Darilla Necklace with Wings and Cloak
-
Asylum Passport
-
Pet Reinforcement Manual
-
Resurrection Orbs
Knight note:
Karkaen Necklace is good for +1 skill rank.
Pargon Ring is useful for Cast Knight because it gives cast speed.
Darilla Necklace is safer if you need more defense.
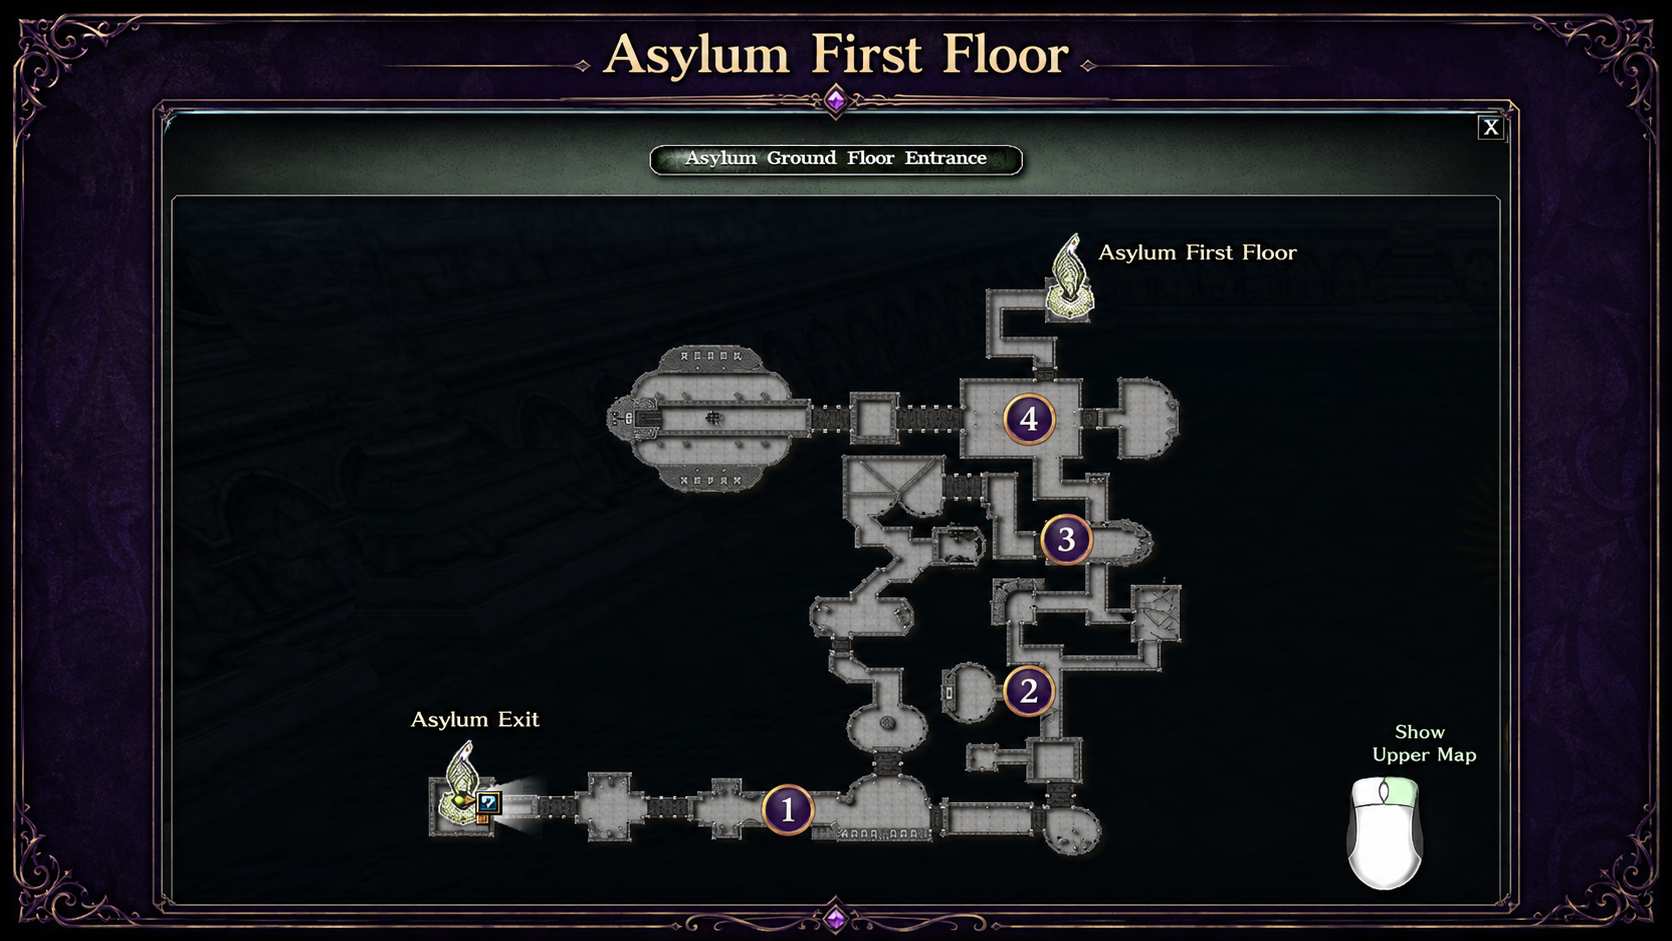
Levels 48 to 54
Use the Asylum Passport from level-up rewards.
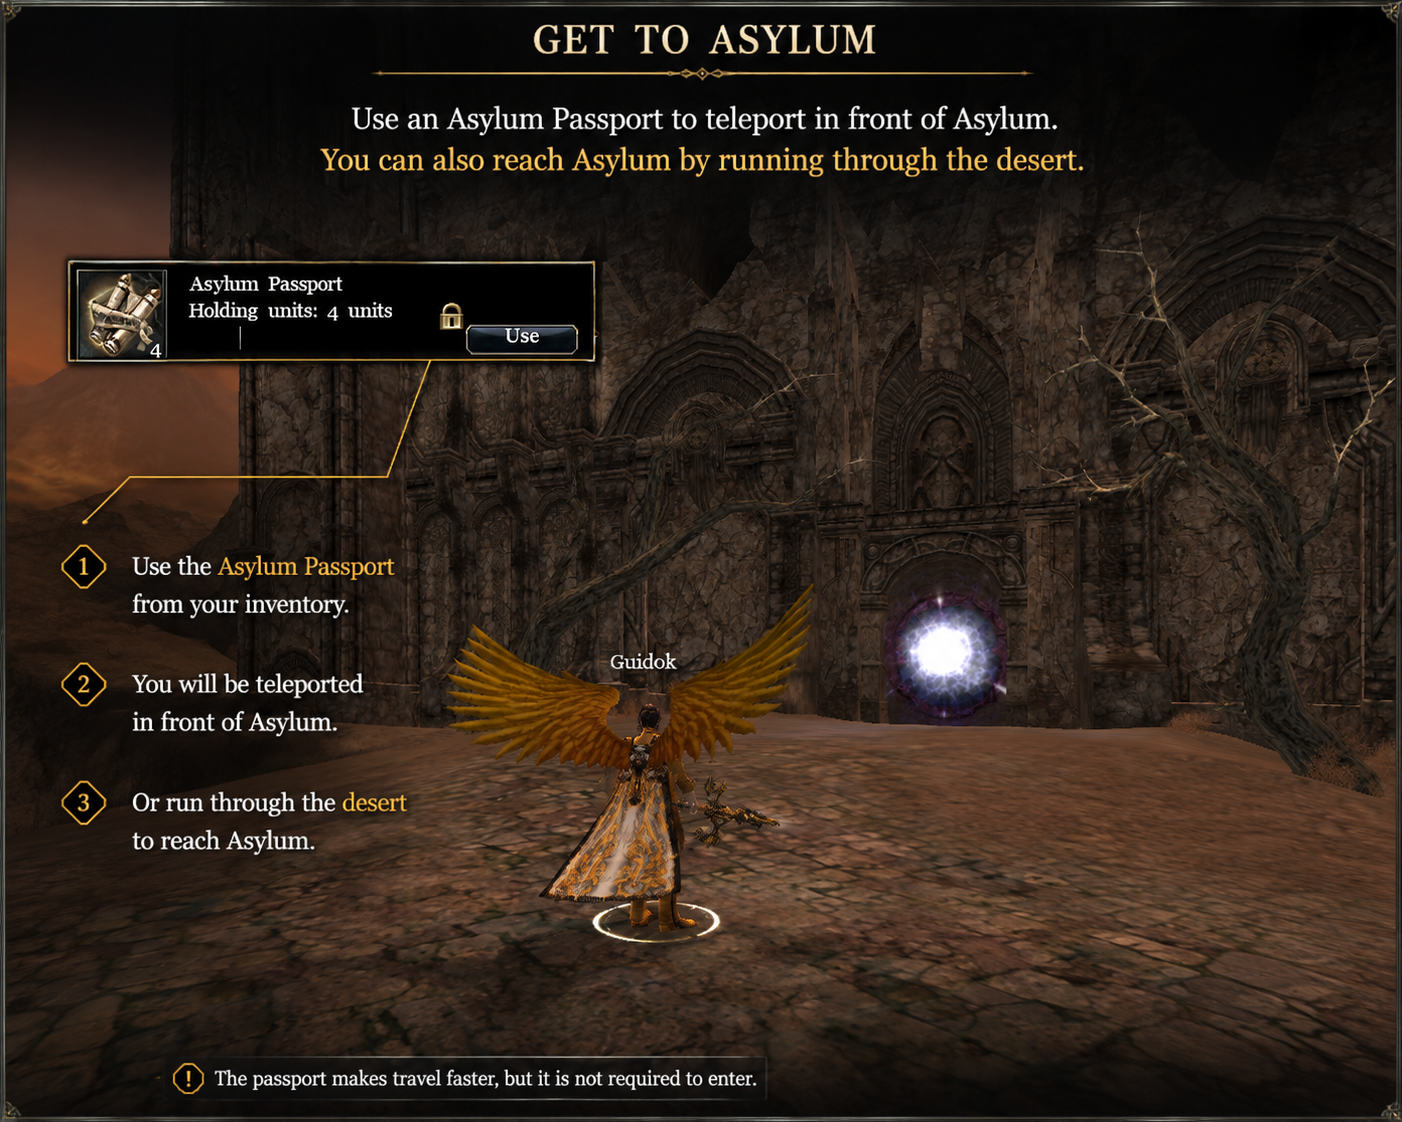
Go to Asylum.
Farm by rotating between the main rooms. Do not wait in empty rooms.
Knight note:
If monsters die slowly, improve your weapon first. Both Cast Knight and Crit Knight need a stronger weapon to level smoothly.
Levels 54 to 67
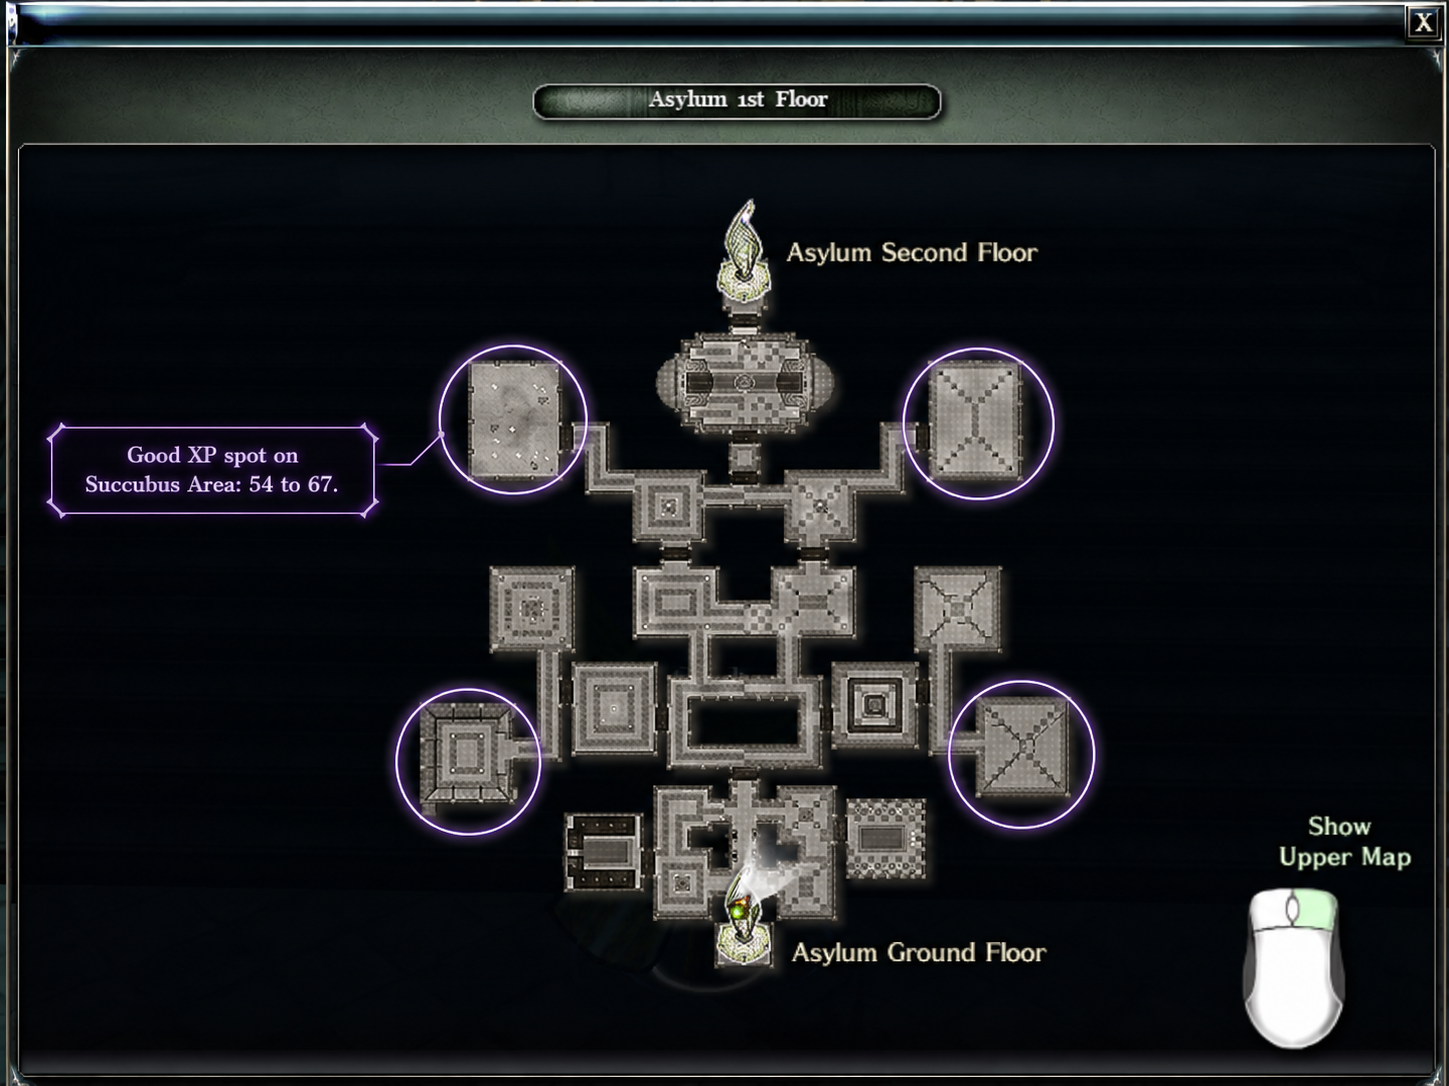
Go to Asylum Second Floor.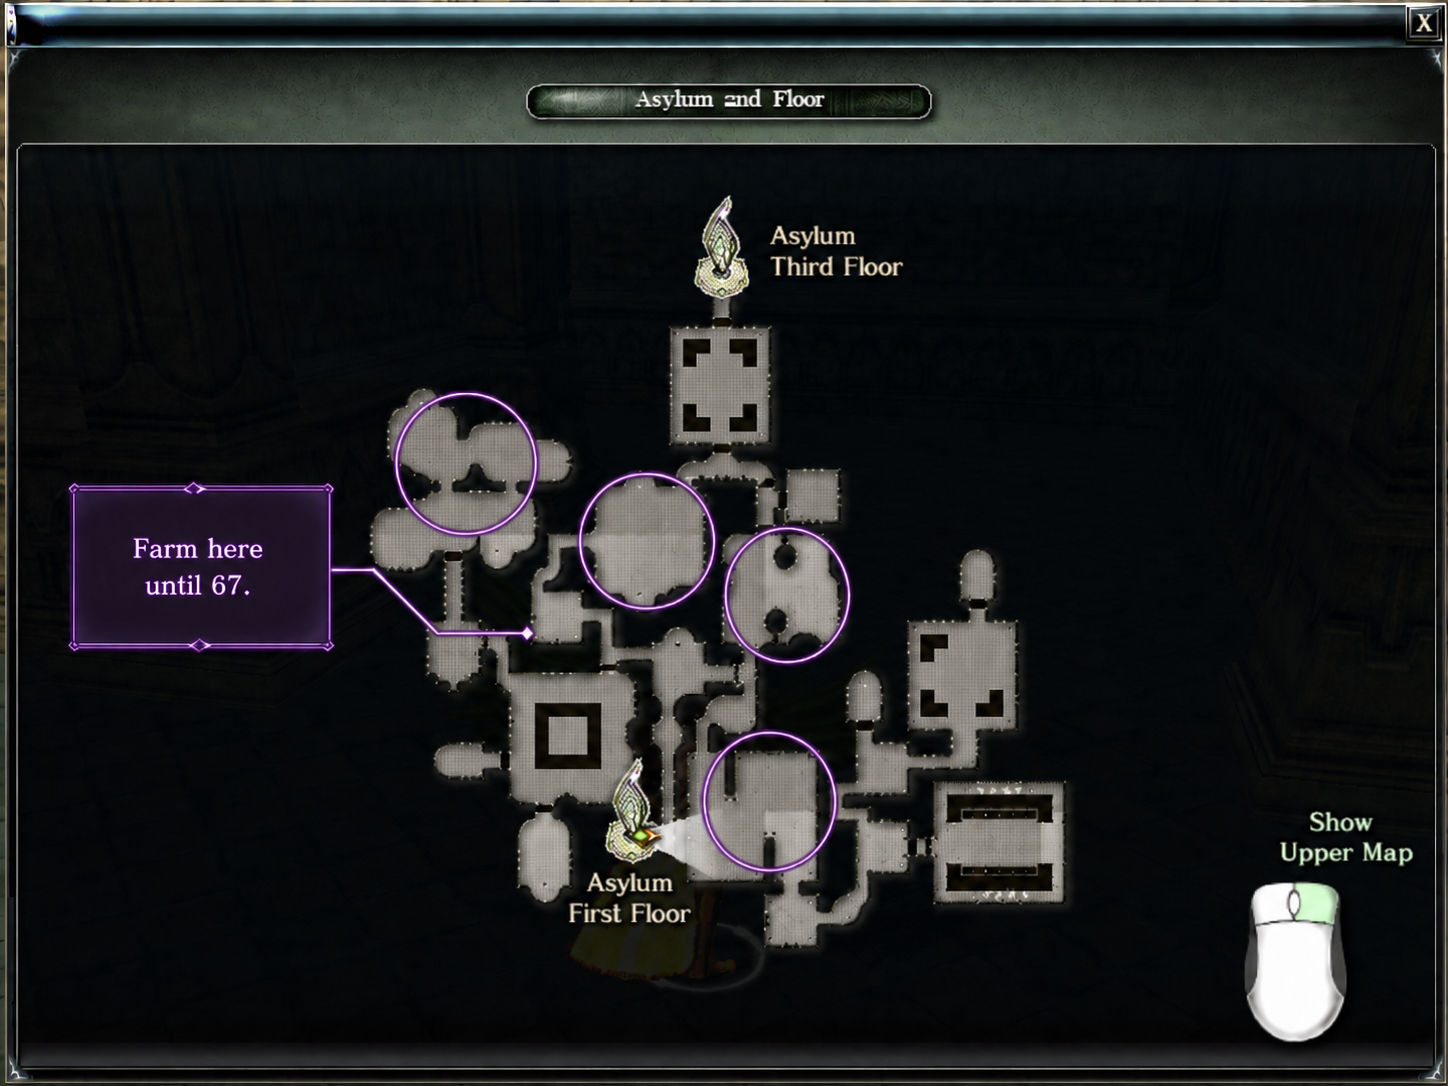
Farm Succubus monsters until level 67.
Useful rewards around this stage:
-
Biglos Necklace with Wings and Cloak
-
Guardimesh Necklace with Wings and Cloak
-
Recovery Potions
-
Talisman of Awakening
-
Talisman of Heavenly Luck
Knight note:
Biglos is better for Cast Knight because it gives cast speed.
Guardimesh is better for Crit Knight because it gives attack speed and dodge.
Levels 67 to 70
Move to Asylum Third Floor.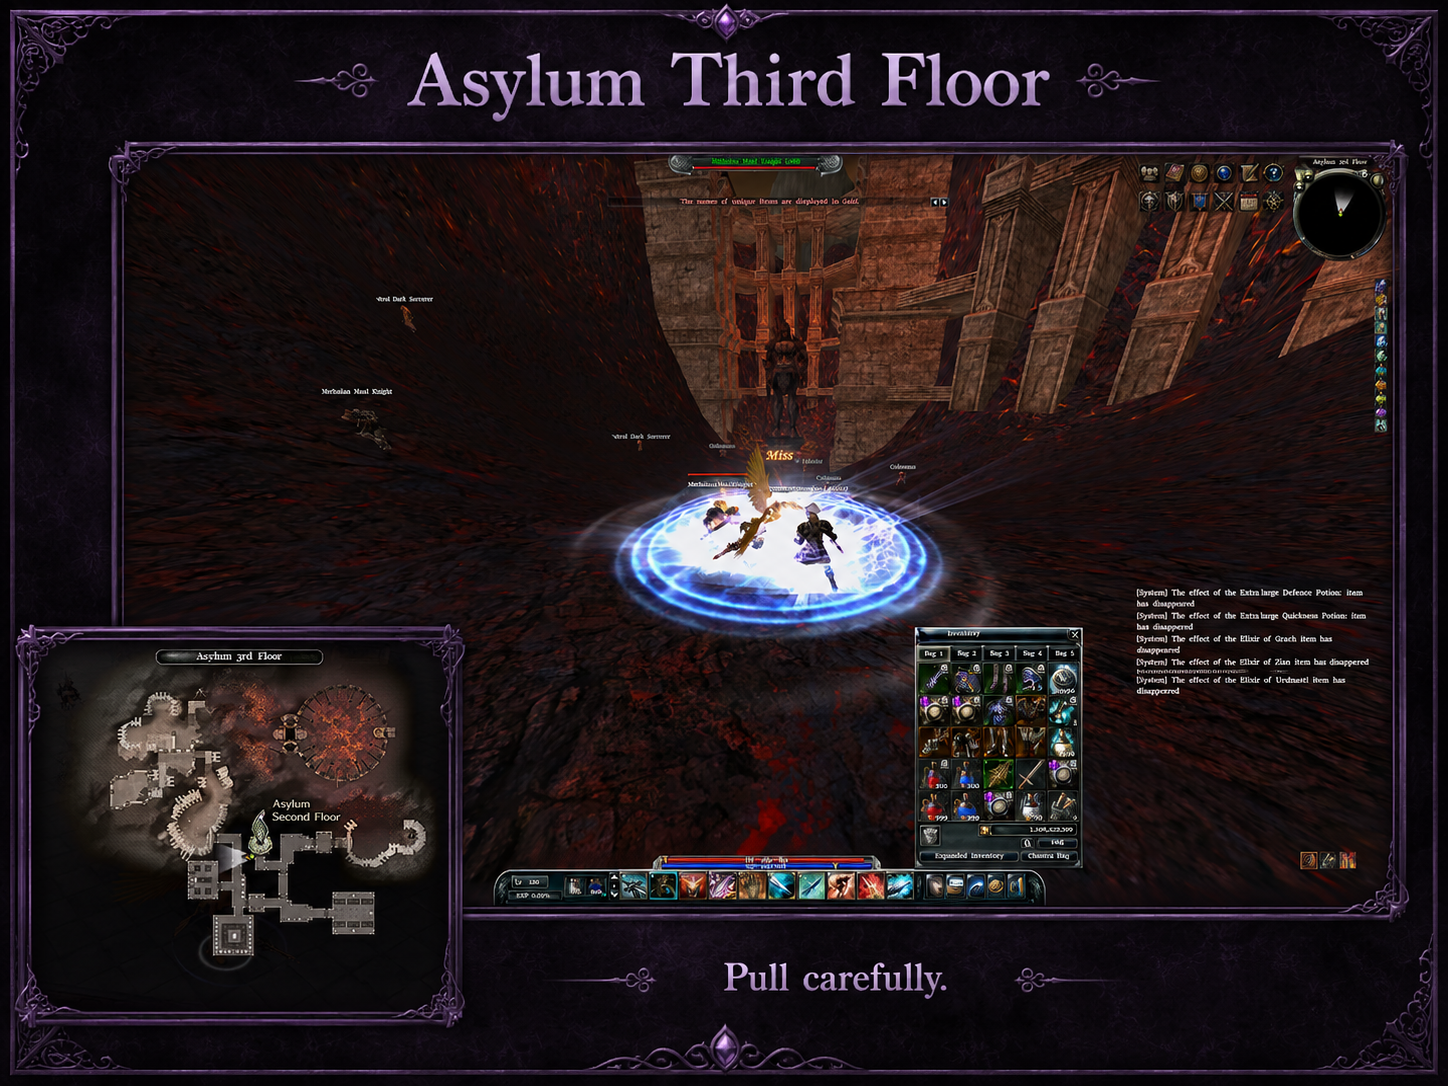
Monsters are stronger here. Start with small pulls. Pull more only if your Knight survives easily.
Knight note:
Cast Knight should focus on skill rotation and cooldown.
Crit Knight should focus on attack speed, damage, and splash farming value.
Simple Advice After Level 70
If you die too much:
-
Pull fewer monsters.
-
Use Gaudius or tank rings.
-
Use a tank necklace.
-
Improve armor stones.
-
Use Stamina stones.
-
Use Damage ↔ Tank switch.
If your damage is too low:
-
Upgrade your weapon.
-
Use better damage rings.
-
Use better necklace.
-
Keep Lens Stone+ active.
-
Keep Compound Potion active.
-
Improve stones.
-
Use Cast setup or Crit Splash setup properly.
From level 70 onward, your setup matters more than the spot.
Levels 70 to 120
After level 70, you can still stay in Asylum, Latria, or Ice World for a while, but your main leveling path should move into Realm World, Shinewood, and later Heaven’s Hell World.
Recommended path:
|
Level |
Area |
Main goal |
|
70 to 75 |
Ice Realm / Frozen Infinity |
Start Realm leveling and get Ohkeros Rings |
|
75 to 80 |
Lightning Realm / Teslon Outpost |
Continue Realm leveling and get Shocker Necklaces |
|
80 to 99 |
Poison Realm / Evergreen Paradise |
Farm Realm mobs and get Gaudius Rings / Luke Necklaces |
|
99+ |
Shinewood / Ellore |
Farm stronger mobs and collect useful materials |
|
100 to 106 |
Heaven’s Hell / Flames of Hell |
Start HH World progression |
|
106 to 113 |
Heaven’s Hell / Bloodline of Life |
Continue HH leveling with stronger gear |
|
113 to 120 |
Heaven’s Hell / Blade Storm Mountain |
Final leveling path toward level 120 |
Both Cast Knight and Crit Knight can level in these areas.
Cast Knight levels with skills, cast speed, cooldown, and elemental damage.
Crit Knight levels with attack speed, physical damage, and Critical Damage Splash.
Tank setup is useful when mobs hit too hard or when you move into harder Heaven’s Hell areas.
Levels 70 to 75: Ice Realm / Frozen Infinity
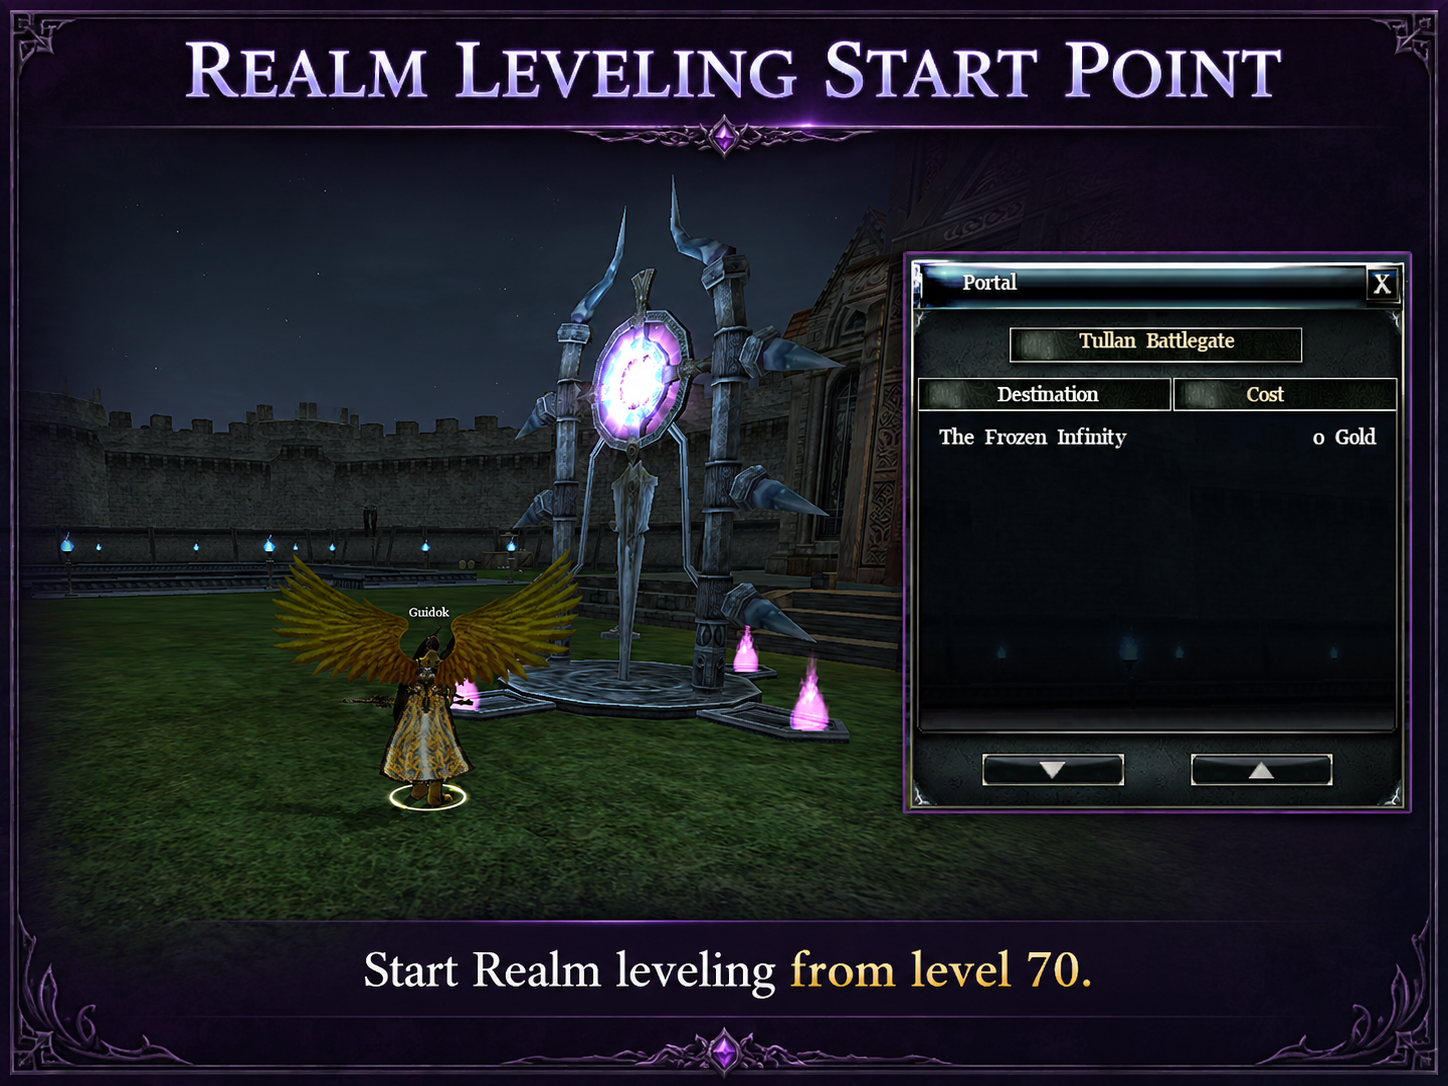
At level 70, you can start the Ice Realm area, also called Frozen Infinity.
You can still farm Ice World from Tullan if needed, but Realm leveling gives better progression and useful quest rewards.
Start with smaller pulls. Realm monsters are stronger than early leveling mobs, and weak armor can still get you killed.
Useful reward:
-
Ohkeros Rings
Knight note:
Ohkeros Ring is very useful for Knight.
Intelligent Ohkeros is great for Cast Knight because it helps damage, cooldown, and elemental attack.
Glorious Ohkeros can work for Crit Knight because it adds damage and Stun hit effect.
Excellent Ohkeros is useful for buff setup because it gives +1 learned skill rank.
Levels 75 to 80: Lightning Realm / Teslon Outpost
At level 75, move to Lightning Realm, also called Teslon Outpost.
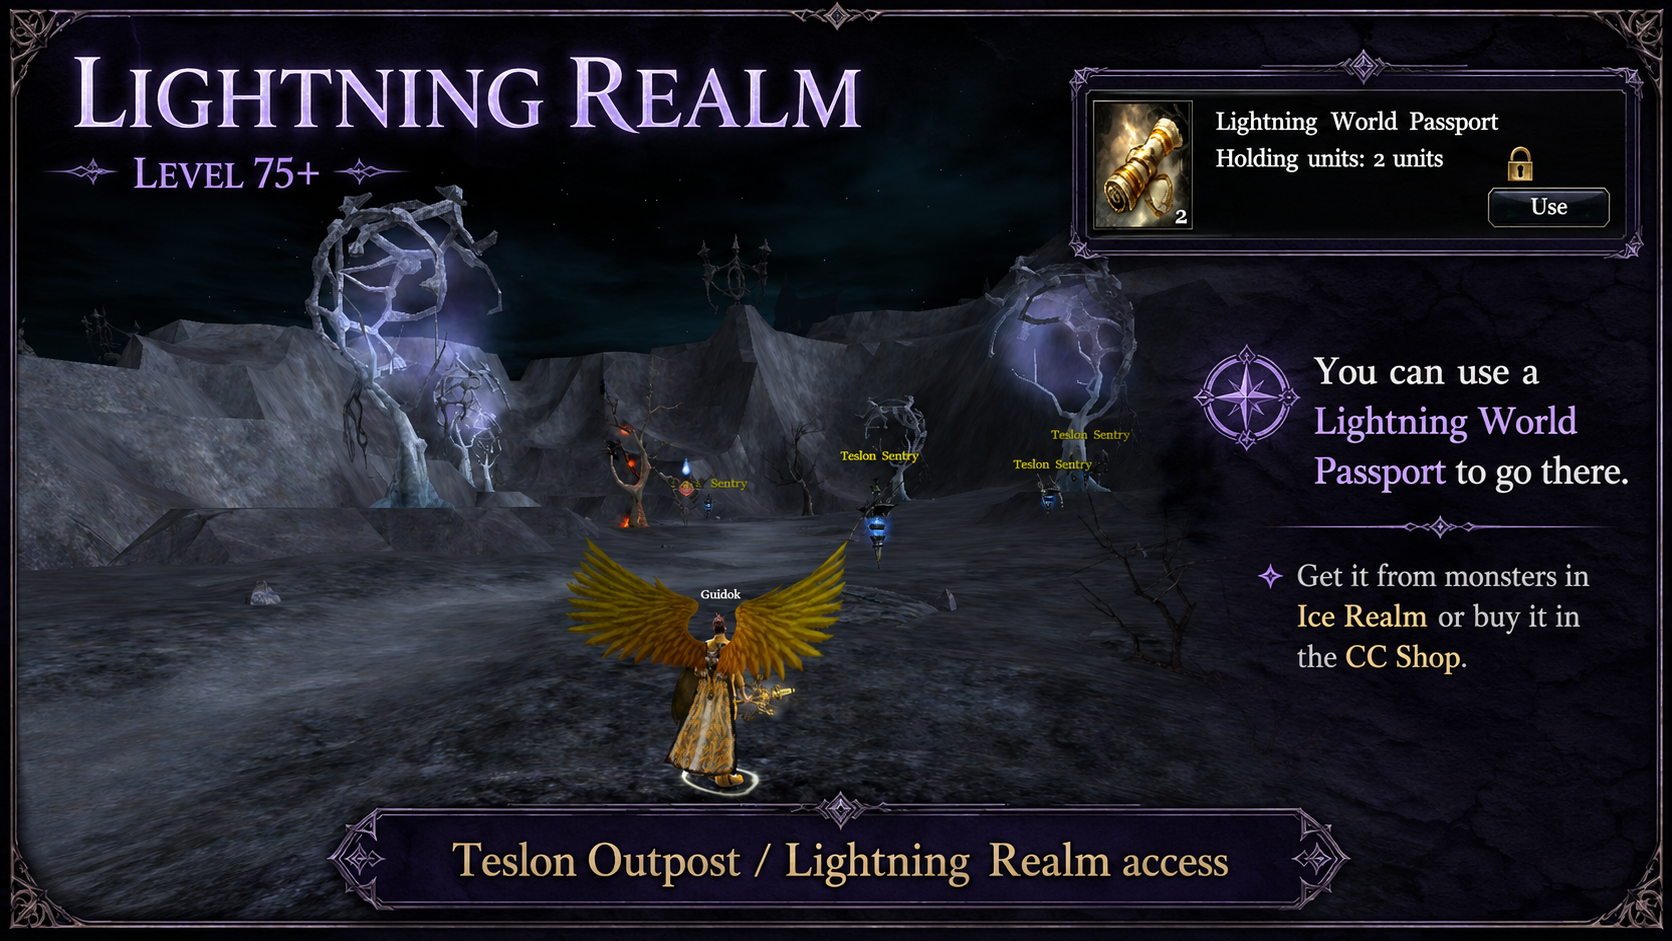
This is the next Realm step after Frozen Infinity.
Useful reward:
-
Shocker Necklaces
Knight note:
Shocker Necklace can be used as a temporary necklace, but Cast Knight should later move toward Luke or Faren, while Crit Knight should later move toward Hwaridun or Faren.
If your damage feels low here, upgrade your weapon before pulling bigger monster groups.
Levels 80 to 99: Poison Realm / Evergreen Paradise
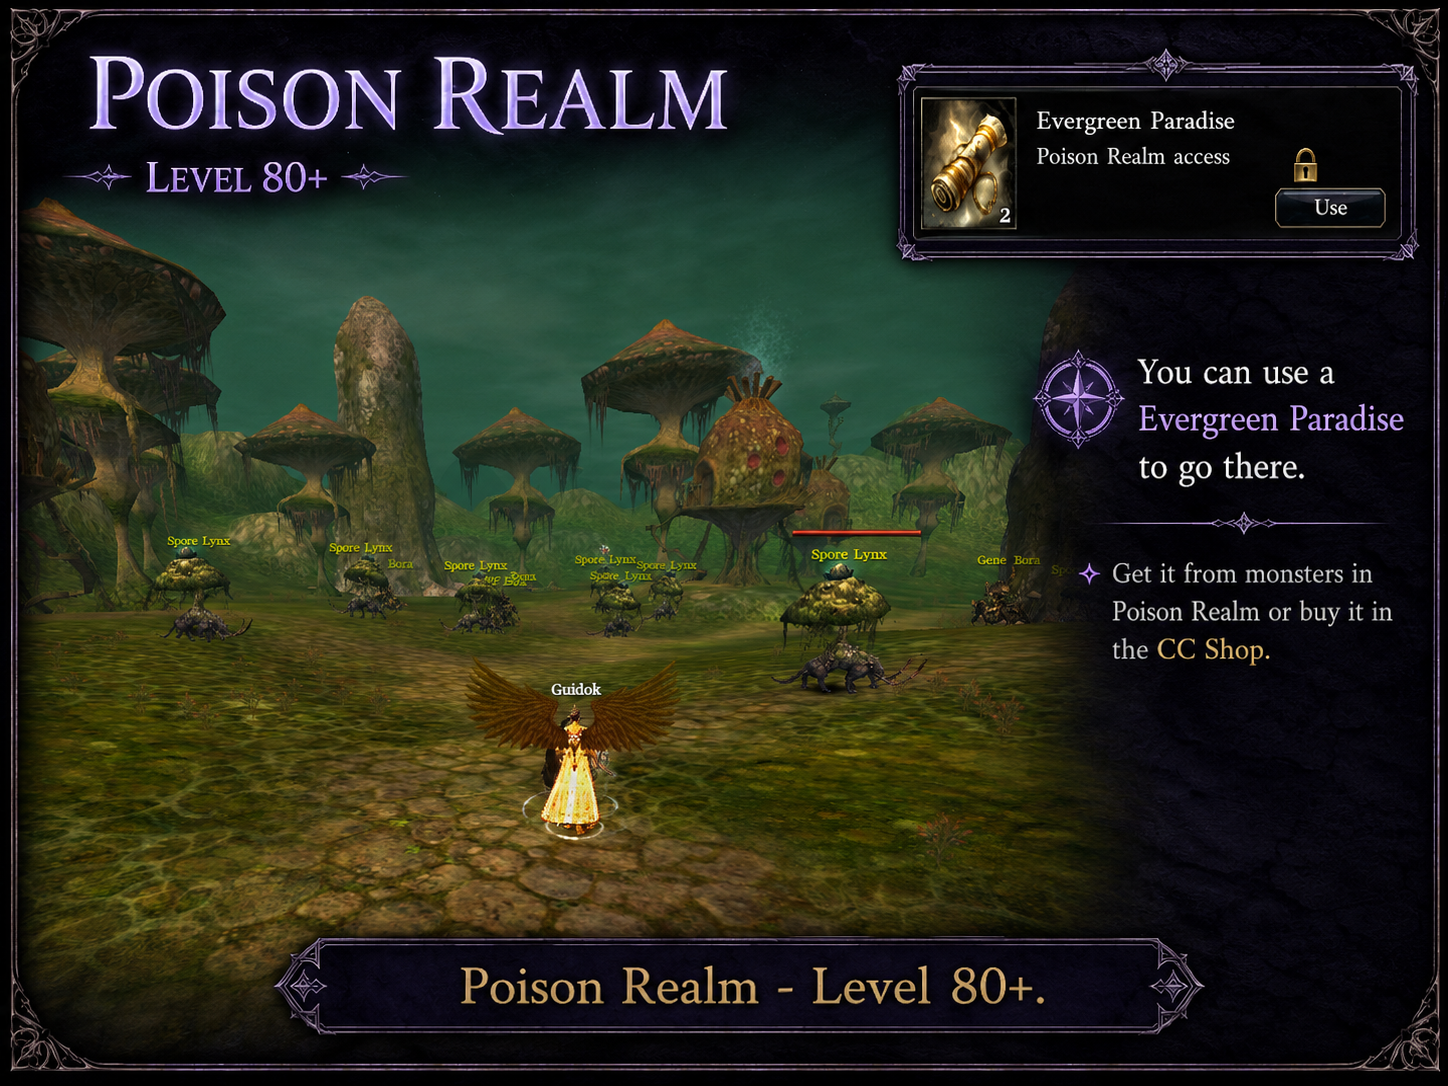
At level 80, move to Poison Realm, also called Evergreen Paradise.
This is your main leveling area before Shinewood.
Useful rewards:
-
Gaudius Rings
-
Luke Necklaces
Knight note:
Gaudius Ring is very useful for Tank Knight, buff setup, and safer farming.
Luke Necklace is very strong for Cast Knight.
Crit Knight can continue farming here with Glorious accessories and Critical Damage Splash.
Recommended focus:
|
Knight type |
What to use |
|
Cast Knight |
Intelligent Ohkeros, Intelligent Luke, cast speed, cooldown |
|
Crit Knight |
Glorious Logo, Glorious Ohkeros, Glorious Bellos later |
|
Tank Knight |
Gaudius Rings, defensive necklace, Stamina stones |
|
Balanced Knight |
Damage accessories with one safer tank item |
Main goal:
-
Farm Realm mobs.
-
Complete Realm quests when possible.
-
Get useful Gaudius Rings and Luke Necklaces.
-
Improve your weapon.
-
Improve your armor stones.
-
Prepare for Shinewood.
Level 99+: Shinewood / Ellore
At level 99, start Shinewood quests in Ellore.
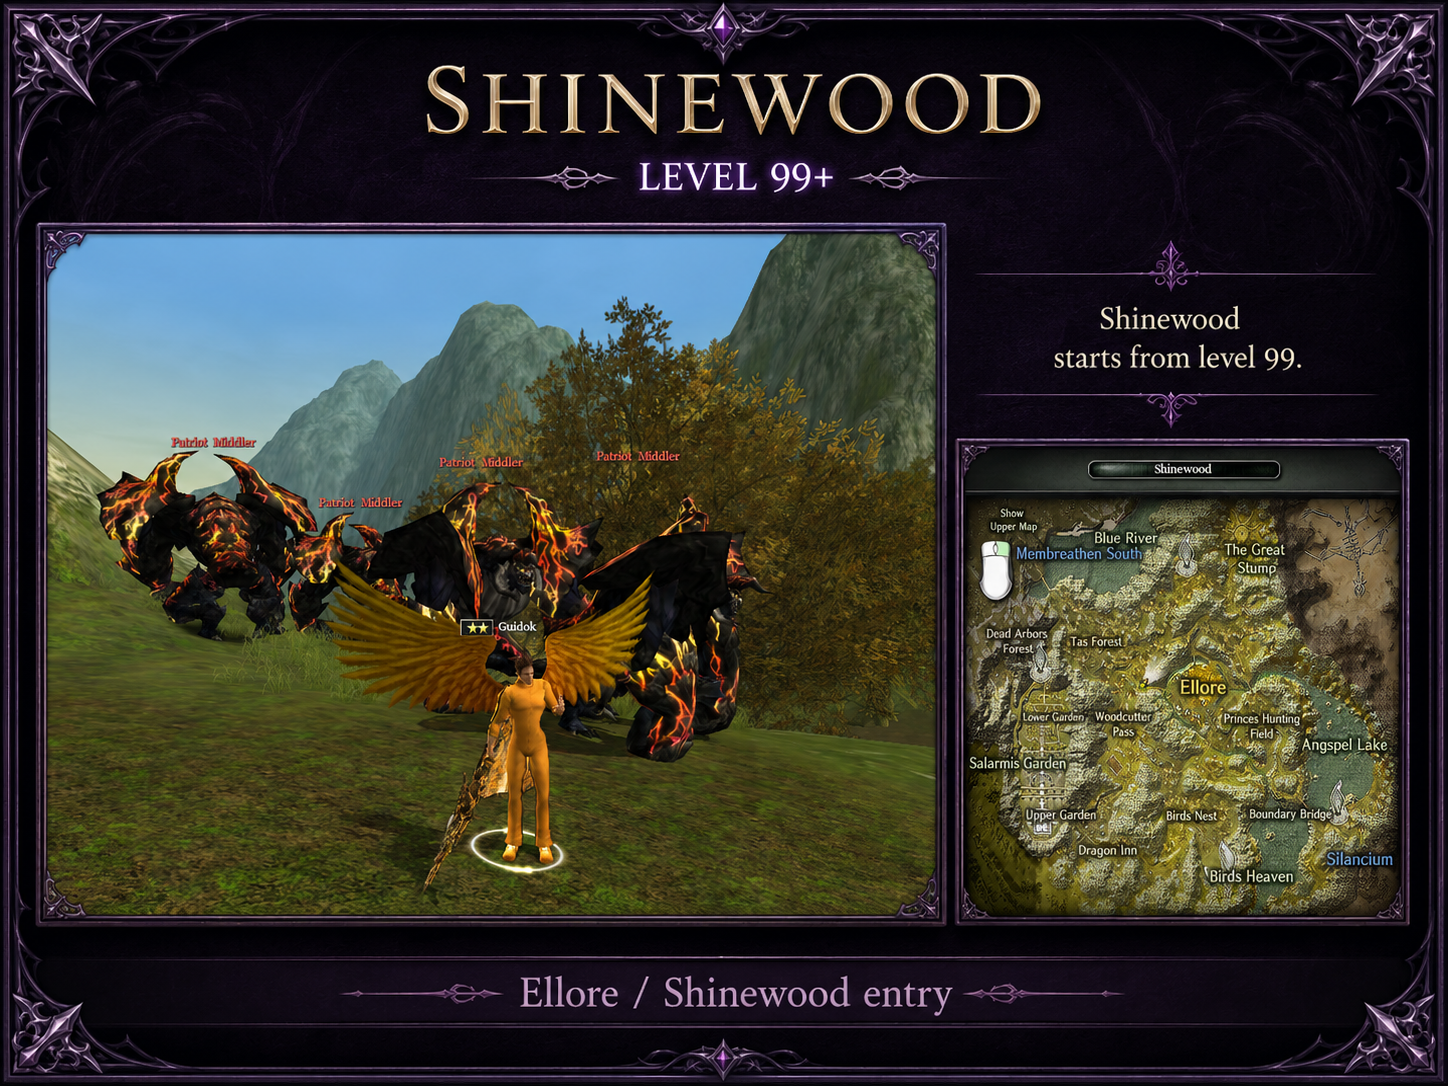
Shinewood is harder than Realm maps, so do not enter with weak gear and no potions.
Before Shinewood, prepare:
-
Better weapon
-
Better rings
-
Better necklace
-
Armor with useful stones
-
Pet active
-
Lens Stone+
-
Compound Potion
-
Damage ↔ Tank gear switch
-
Buff ↔ Fight gear switch if available
Useful rewards from Shinewood quests include:
-
Shard of Rebirth
-
Tempering Gems
Knight note:
Cast Knight should keep using skill farming with cast speed and cooldown.
Crit Knight should keep using attack speed and Critical Damage Splash.
Tank setup becomes more important here because mobs hit harder.
Levels 100 to 106: Heaven’s Hell / Flames of Hell
At level 100, you can start Heaven’s Hell progression in Flames of Hell.
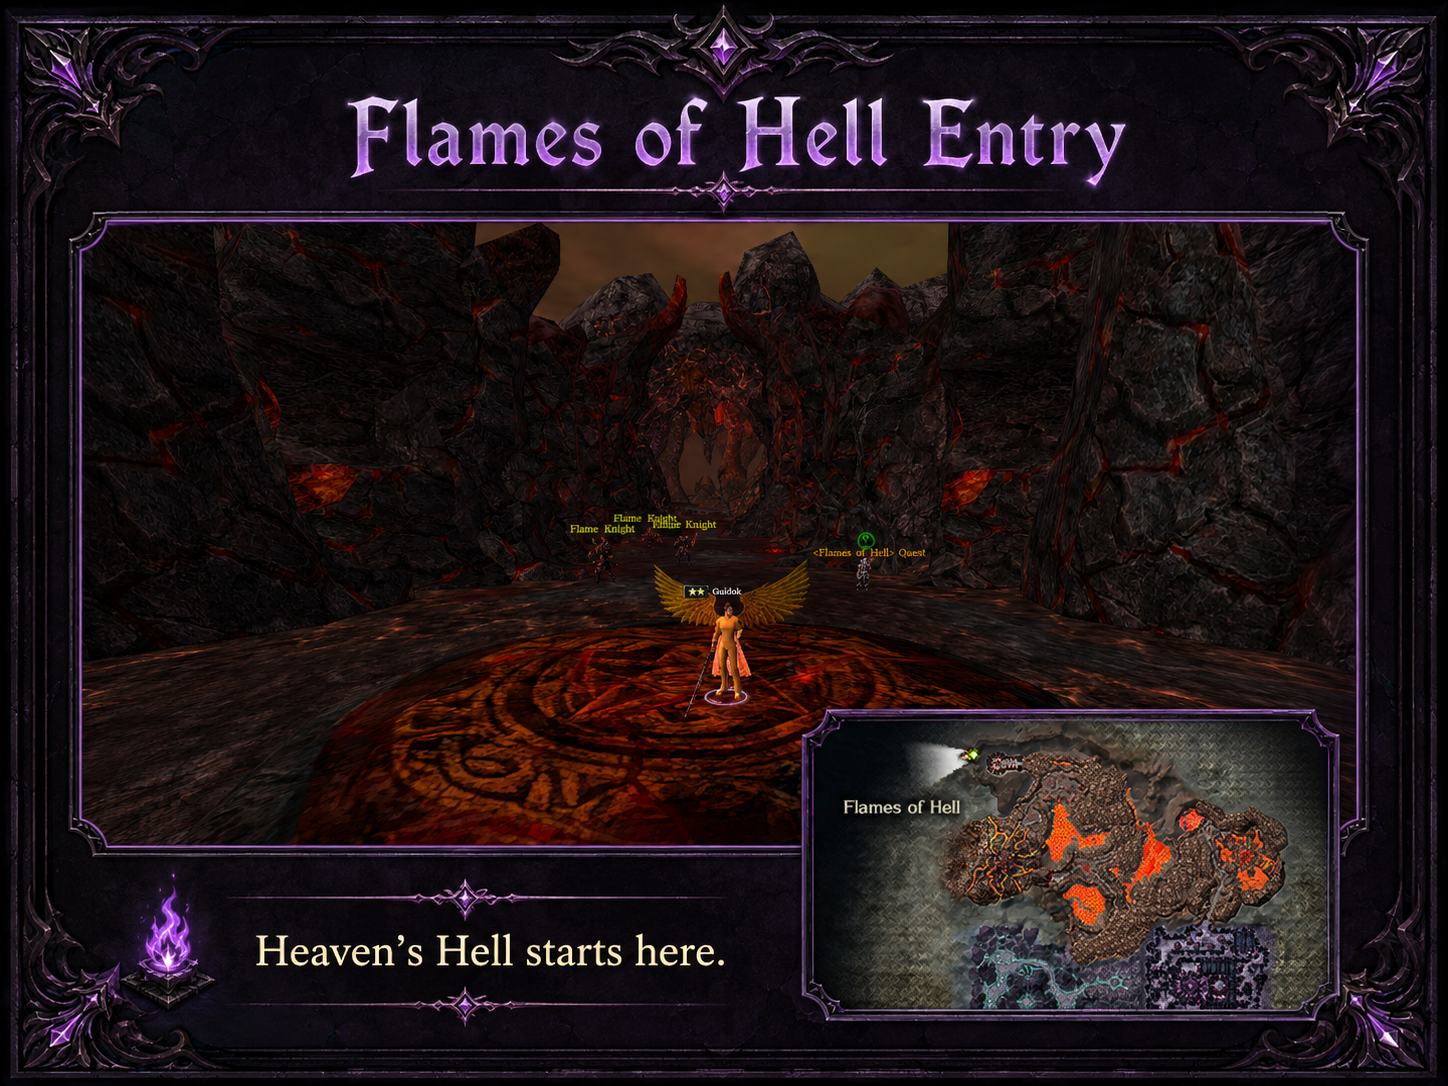
This is harder than Realm and Shinewood leveling, so gear matters much more.
Before Flames of Hell, prepare:
-
Damage set
-
Tank set
-
Buff set if available
-
Better weapon
-
Better armor stones
-
Stronger rings and necklace
-
Macro Manager setup
-
Potions
Knight note:
Do not pull too many mobs at first. Test the damage first, then increase the pull size if you survive.
Levels 106 to 113: Bloodline of Life
At level 106, continue into Bloodline of Life.
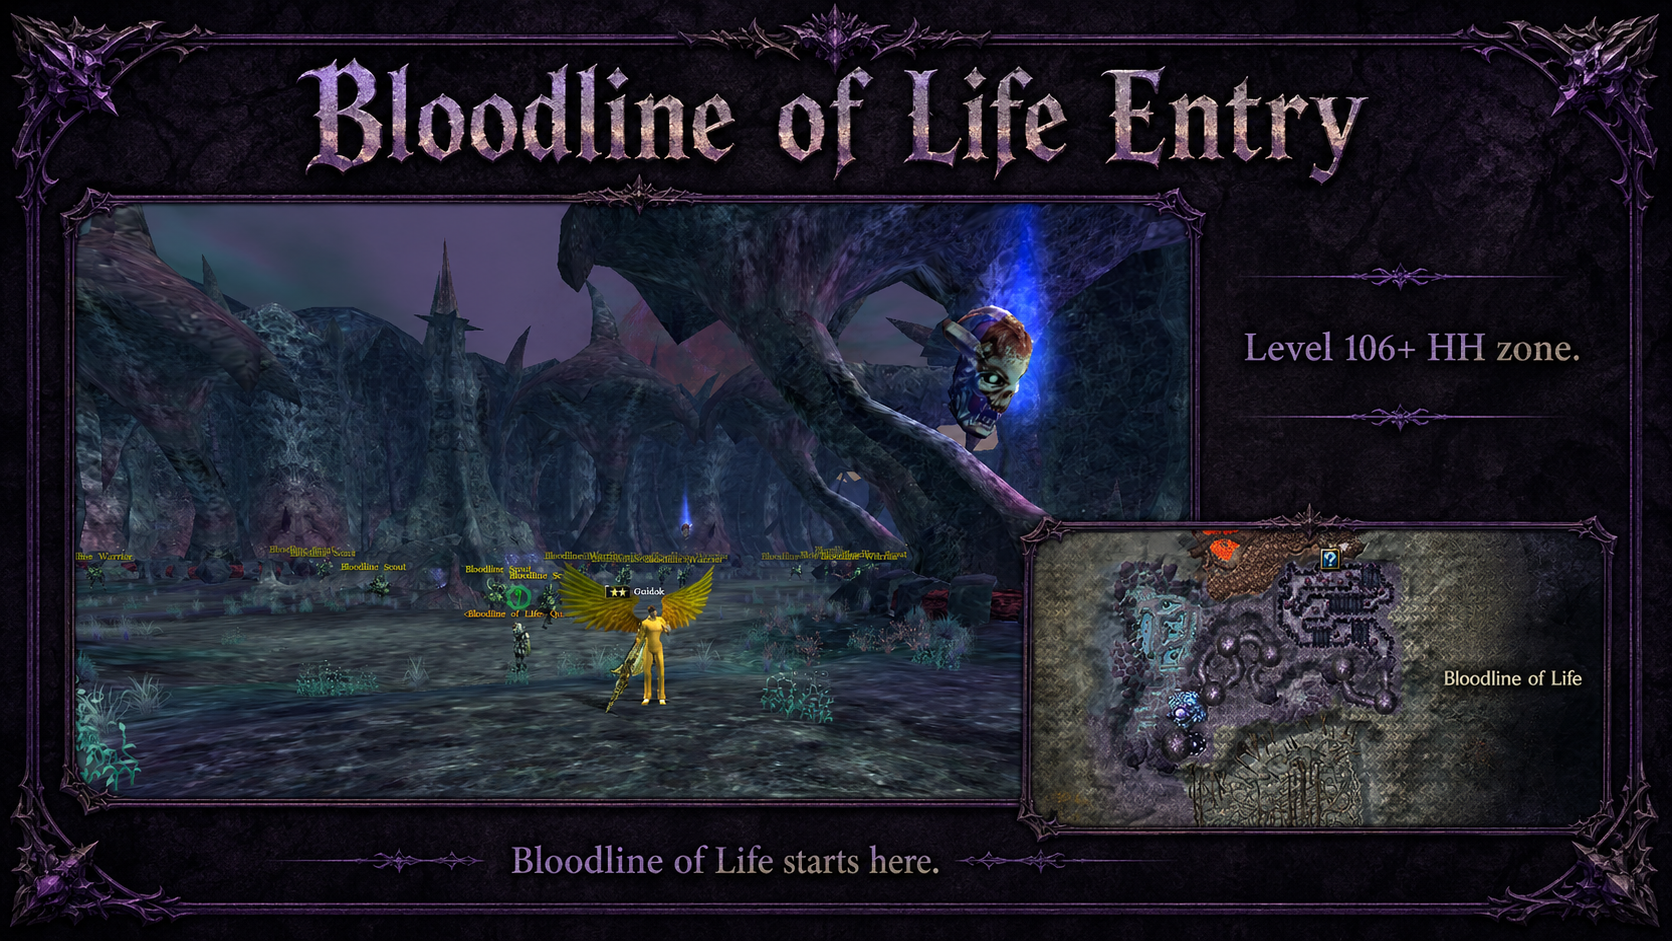
This is the next Heaven’s Hell step. Monsters are stronger, so your Knight needs better gear and proper gear switching.
Knight note:
If full damage gear feels risky, switch to tank gear. Do not force big pulls if you cannot survive them.
Cast Knight should focus on cooldown, cast speed, and skill farming.
Crit Knight should focus on attack speed, damage, and Critical Damage Splash.
Tank Knight is slower for solo leveling, but much safer.
Levels 113 to 120: Blade Storm Mountain
At level 113, move into Blade Storm Mountain.
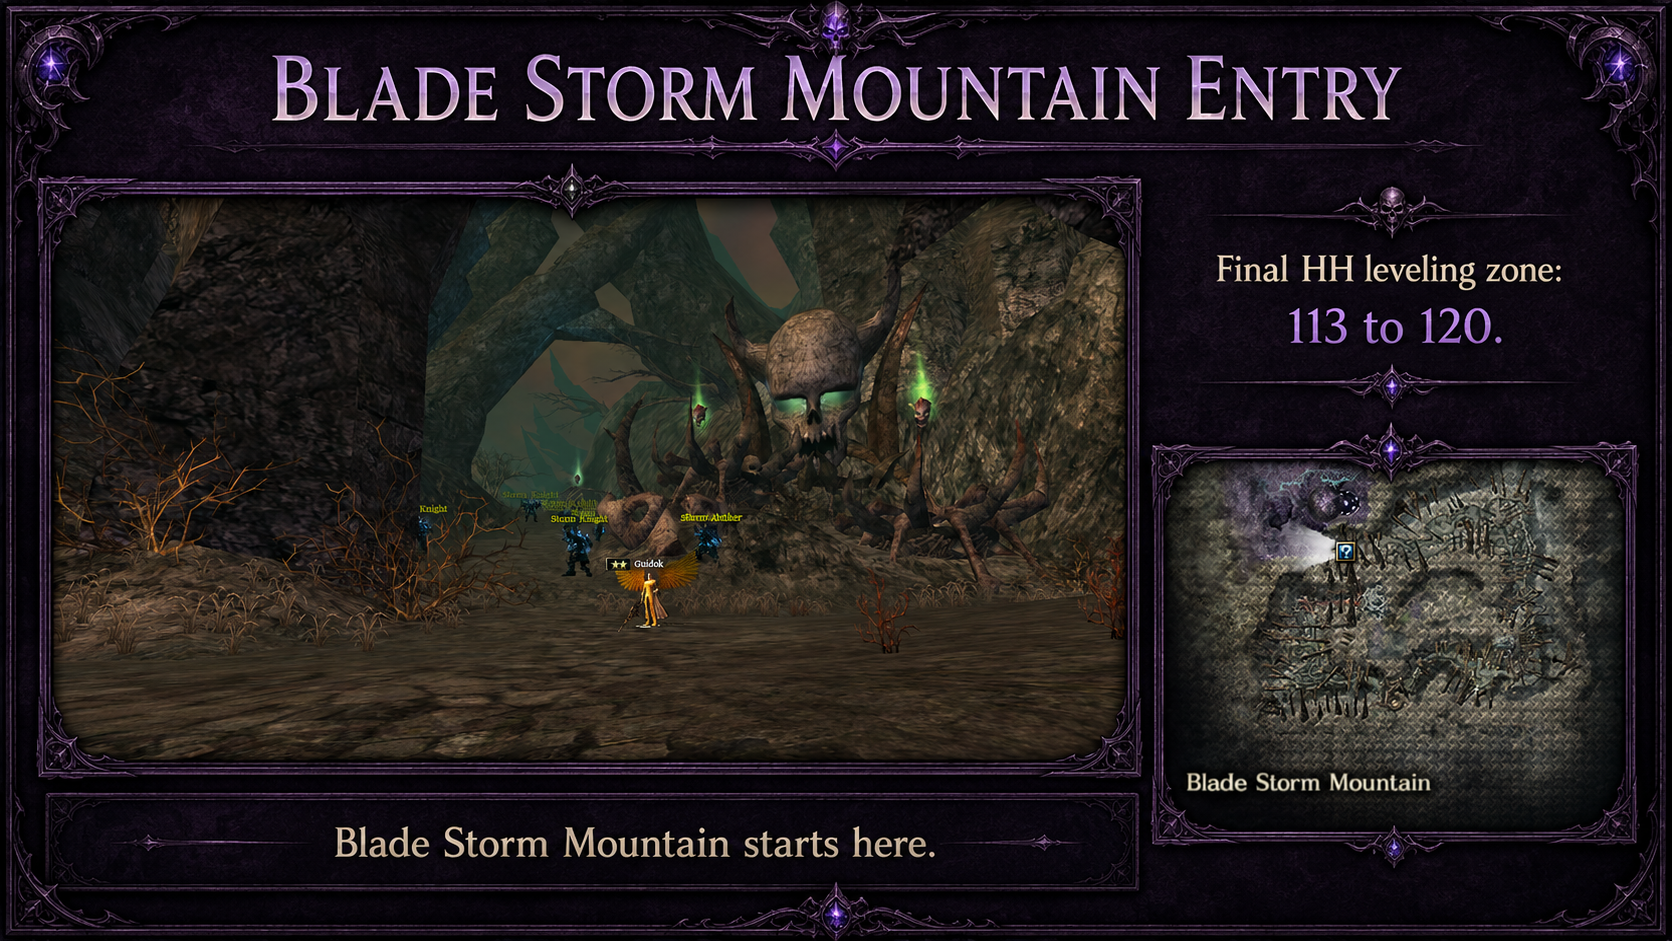
This is the final main Heaven’s Hell leveling zone toward level 120.
Before farming here, prepare:
-
Strong weapon
-
Good rings and necklace
-
Useful armor yellows
-
Better stones
-
Damage ↔ Tank switch
-
Buff ↔ Fight switch
-
Correct Oread if available
-
Potions
-
Free inventory space
Knight note:
Blade Storm Mountain is not only about damage. You need survival, movement, control, and smart gear switching.
Use damage gear only if you can survive. If mobs hit too hard, switch to tank or balanced setup.
Knight Skills and Skill Sets
Knight can be built in three main ways:
-
Cast Knight
-
Crit Knight
-
Tank Knight
You do not need to stay with only one setup forever. You can create different skill sets for different situations and switch between them when needed.
For example:
|
Skill set |
Best use |
|
Cast Set |
Leveling, farming, skill damage |
|
Crit Set |
Critical Damage Splash, PvE, PvP damage |
|
Tank Set |
Bosses, hard zones, PvP survival |
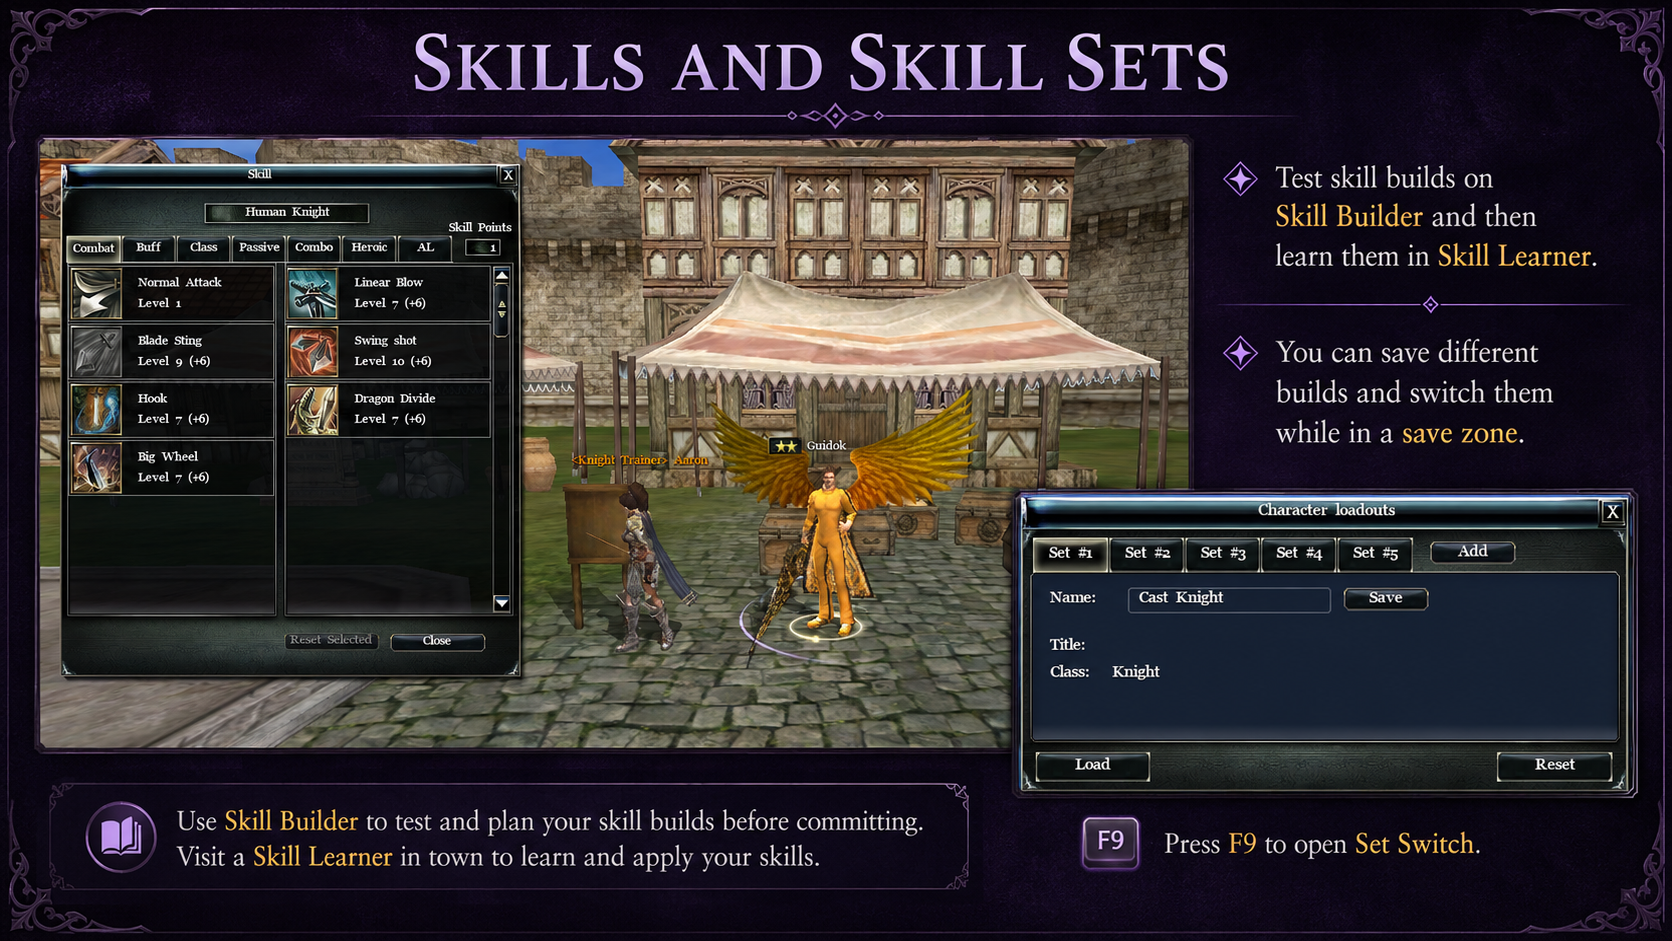
Use the Skill Builder to test your builds first. After that, learn the skills in the Skill Learner.
You can switch between saved skill sets while standing in a safe zone.
To open the Set Switch window, press F9.
Knight note:
This is very useful because you can level with Cast or Crit setup, then switch to Tank setup for bosses, PvP, or harder zones.
Cast Knight
Cast Knight uses skills to farm.
It focuses on:
-
Skill damage
-
Cast speed
-
Cooldown reduction
-
Elemental damage
-
Heroic damage
-
All stats
-
Survival
Cast Knight is smooth for PvE because it can keep using skills on monster groups.
Cast Knight Skill Direction
Use the official Skill Builder for exact points.
[Official tool: Skill Builder]
Important Cast Knight skills:
|
Skill type |
Skills |
|
Main farming |
Linear Blow, Big Wheel, Dragon Divide |
|
Damage support |
Power Blade, Brute Force, Supreme Damage |
|
Survival |
Health Burst, Defense Hold, Spirit Shield |
|
Movement |
Sprint |
|
Utility |
Defence Breaker, Bellow, Solidarity |
Cast Knight Gear
Early Cast gear
|
Slot |
Item |
Why |
|
Ring |
Intelligent Shuta |
+skill rank and elemental attack |
|
Ring |
Intelligent Blode |
+skill rank, sustain, elemental attack |
|
Ring |
Intelligent Pargon |
Cast speed and elemental attack |
|
Necklace |
Intelligent Karkaen |
+skill rank and elemental attack |
|
Necklace |
Intelligent Biglos |
Cast speed and elemental attack |
Mid Cast gear
|
Slot |
Item |
Why |
|
Ring |
Intelligent Ohkeros |
Damage, stun, cooldown, elemental attack |
|
Ring |
Excellent Ohkeros |
+skill rank setup |
|
Ring |
Excellent Gadius |
Buff or safer setup |
|
Necklace |
Intelligent Luke |
Strong Cast Knight necklace |
|
Necklace |
Excellent Luke |
+skill rank setup |
Endgame Cast gear
|
Slot |
Item |
Why |
|
Ring |
Intelligent Yalquninas |
Cast speed, skill block, all stats |
|
Ring |
Excellent Yalquninas |
+skill rank with cast value |
|
Ring |
Intelligent Feathered |
Damage, +skill rank, all stats |
|
Necklace |
Intelligent Faren |
+2 skill ranks, damage, all stats |
|
Necklace |
Excellent Faren |
+2 skill ranks and Max HP |
|
Oread |
Cynsoura |
Best Cast Knight Oread |
Cast Knight sockets
|
Item |
Best socket direction |
|
Rings |
Fragment of Ashtal + Prayer Stone of Ring Spirit |
|
Necklace |
Fragment of Ashtal + Wing + Cloak |
Crit Knight
Crit Knight uses fast physical hits and critical-style damage.
This build is good for:
-
Crit splash leveling
-
PvE farming
-
PvP
-
Faster physical damage
-
Players who want one build direction for farming and fighting
Crit Knight is not only a PvP build. It can level with Critical Damage Splash when your gear supports it.
Crit Knight Main Stats
Focus on:
-
Physical Damage
-
Damage
-
Attack Speed
-
Attack Rating
-
Heroic Attack Power
-
Critical-style hit effects
-
Ignore Defense
-
Ignore Block and Dodge Rate
-
Movement Speed
-
All Stats
Crit Knight Skill Direction
Use the official Skill Builder for exact points.
[Official tool: Skill Builder]
Important Crit Knight skills:
|
Skill type |
Skills |
|
Main damage |
Triple Slash, Blade Sting, Strike of Death, Dragon Divide |
|
Attack support |
Speed Attack, Power Blade, Brute Force, Supreme Damage |
|
Survival |
Health Burst, Defense Hold, Spirit Shield |
|
Control |
Shield Bash, Stun Shock, Hook, Bellow |
|
Movement |
Sprint, Forced March from Rank 5 |
Crit Knight can use one PvE/PvP build because the difference is not huge.
Crit Knight Gear
Early Crit gear
|
Slot |
Item |
Why |
|
Ring |
Glorious Shuta |
+skill rank and hit effect |
|
Ring |
Glorious Blode |
+skill rank, sustain, hit effect |
|
Ring |
Glorious Logo |
Attack speed and hit effect |
|
Necklace |
Excellent Karkaen |
+skill rank and safe early setup |
|
Necklace |
Glorious Guardimesh |
Attack speed, movement, dodge |
Mid Crit gear
|
Slot |
Item |
Why |
|
Ring |
Glorious Logo |
Attack speed and hit effect |
|
Ring |
Glorious Ohkeros |
Damage, cooldown, stun, hit effect |
|
Ring |
Glorious Bellos |
Strong physical damage ring |
|
Necklace |
Glorious Hwaridun |
Heroic power, ignore defense, attack speed |
|
Necklace |
Glorious Norgen |
Balanced damage and defense |
Endgame Crit gear
|
Slot |
Item |
Why |
|
Ring |
Glorious Bellos |
Attack speed, attack rating, stun, strong hit effect |
|
Ring |
Glorious Sentinel |
Defensive physical damage option |
|
Ring |
Glorious Feathered |
Endgame damage and +skill rank |
|
Necklace |
Glorious Werewolf |
Block, movement, strong hit effect |
|
Necklace |
Glorious Faren |
+2 skill ranks and damage |
|
Oread |
Helike |
Best Crit Knight Oread |
Crit Knight sockets
|
Item |
Best socket direction |
|
Rings |
Lv6 Might Prayer Stone + Prayer Stone of Ring Spirit |
|
Necklace |
Lv6 Might Prayer Stone + Wing + Cloak |
Use Fragment of Ashtal instead of Might if you want balanced tank and damage.
Tank Knight
Tank Knight is used when survival matters more than damage.
Every Knight should build a Tank Set later.
Tank Knight is best for:
-
Bosses
-
PvP
-
Siege
-
Hard zones
-
Surviving burst damage
-
Buffing safely
-
Holding pressure
Tank Knight Main Stats
Focus on:
-
Max HP
-
All Stats
-
Defense
-
Block
-
Skill Block
-
Dodge
-
Evade
-
Physical Resistance
-
Elemental Resistance
-
Critical Hit Resistance
-
Damage Taken Reduction
-
Stun Duration Reduction
-
Slow Duration Reduction
-
HH Effect Duration Reduction
Tank Knight Gear
Early Tank gear
|
Slot |
Item |
Why |
|
Ring |
Excellent Flying |
Early tank and +skill rank |
|
Ring |
Glorious Shuta |
+skill rank |
|
Ring |
Glorious Blode |
+skill rank and sustain |
|
Necklace |
Excellent Darilla |
Defense, resistance, +skill rank |
|
Necklace |
Excellent Karkaen |
+skill rank |
Mid Tank gear
|
Slot |
Item |
Why |
|
Ring |
Excellent Gadius |
+skill rank, block, skill block, movement |
|
Ring |
Brilliant Gadius |
Sustain, block, skill block |
|
Necklace |
Excellent Norgen |
+skill rank and defensive value |
|
Necklace |
Glorious Norgen |
Balanced tank and damage |
Endgame Tank gear
|
Slot |
Item |
Why |
|
Ring |
Excellent Sentinel |
Tank and balanced setup |
|
Ring |
Excellent Gadius |
Block and skill block |
|
Ring |
Excellent Feathered |
+skill rank endgame setup |
|
Necklace |
Excellent Faren |
+2 skill ranks and Max HP |
|
Necklace |
Excellent Werewolf |
Block and movement |
|
Oread |
Ida |
Best against cast damage |
|
Oread |
Adrasteia |
Best against physical and critical damage |
Tank Knight sockets
|
Item |
Best socket direction |
|
Rings |
Lv6 Stamina Prayer Stone + Prayer Stone of Ring Spirit |
|
Necklace |
Lv6 Stamina Prayer Stone + Wing + Cloak |
Unique Accessories for Knight
Knight should not use one accessory setup forever.
You need different setups:
|
Set |
When to use |
|
Cast Set |
Skill farming |
|
Crit Set |
Crit splash farming and PvP |
|
Tank Set |
Bosses and hard fights |
|
Buff Set |
Before fights for +skill rank |
|
Balanced Set |
When full damage is risky |
[Official guide: Unique Rings]
[Official guide: Unique Necklaces]
[Official guide: Unique Accessories Refinery]
Best simple ring paths
|
Build |
Simple ring path |
|
Cast Knight |
Intelligent Shuta / Blode → Intelligent Ohkeros → Yalquninas / Feathered |
|
Crit Knight |
Glorious Shuta / Blode → Glorious Logo → Glorious Bellos → Glorious Feathered |
|
Tank Knight |
Excellent Flying → Excellent Gadius → Sentinel / Excellent Feathered |
Best simple necklace paths
|
Build |
Simple necklace path |
|
Cast Knight |
Intelligent Karkaen → Intelligent Biglos → Intelligent Luke → Intelligent Faren |
|
Crit Knight |
Excellent Karkaen → Glorious Guardimesh → Glorious Hwaridun → Glorious Faren |
|
Tank Knight |
Excellent Darilla → Excellent Norgen → Werewolf / Excellent Faren |
Attendance Rings for Knight
Attendance Rings are useful if you do not have strong unique rings yet.
|
Attendance Ring |
Best Knight use |
|
Ring of Magical Power |
Cast Knight |
|
Ring of Power |
Crit Knight |
|
Ring of Blessing |
Tank Knight |
|
Ring of Transcendence |
Cast/tank hybrid or cooldown setup |
Use them as temporary rings until you get better unique rings.
Titles for Knight
Use the official title pages for unlock steps and full requirements.
This guide only explains what is good for Knight.
[Official guide: Rank 1, 2 & 3 Titles]
[Official guide: Rank 4 Titles]
[Official guide: Rank 5 Titles]
Rank 1, 2, and 3 Titles
For early titles, focus on useful Knight stats:
-
HP
-
Damage
-
Defense
-
Movement
-
All-around survival
Get these titles as you progress.
Rank 4 and Rank 5 matter more because they add +1 rank to selected skills.
Rank 4 Title: Best Knight Skill Choices
Knight Rank 4 options:
-
Defence Breaker
-
Bellow
-
Sprint
-
Health Burst
-
Solidarity
Best choices:
|
Knight build |
Best Rank 4 choices |
|
Cast Knight PvE |
Defence Breaker or Health Burst |
|
Crit Knight PvE/PvP |
Defence Breaker or Sprint |
|
Tank Knight |
Health Burst or Solidarity |
|
PvP Knight |
Sprint or Bellow |
|
Siege/party Knight |
Solidarity or Health Burst |
Simple choice:
|
Goal |
Choose |
|
Safe choice |
Health Burst |
|
More pressure |
Defence Breaker |
|
PvP movement |
Sprint |
|
PvP control |
Bellow |
|
Party/tank value |
Solidarity |
Rank 5 Title: Best Knight Skill Choices
Knight Rank 5 options:
-
Forced March
-
Shield of the Front
-
Strike of Judgement
-
Terrifying Nemesis
-
Righteous Smite
-
Inexorable Strike
-
Iron Shield
Best choices:
|
Knight build |
Best Rank 5 choices |
|
Cast Knight PvE |
Strike of Judgement or Righteous Smite |
|
Crit Knight PvE/PvP |
Inexorable Strike, Strike of Judgement, or Righteous Smite |
|
Tank Knight |
Shield of the Front or Iron Shield |
|
PvP Knight |
Forced March or Terrifying Nemesis |
|
Siege/party Knight |
Shield of the Front, Iron Shield, or Forced March |
Simple choice:
|
Goal |
Choose |
|
Damage |
Strike of Judgement or Righteous Smite |
|
Aggressive PvP |
Inexorable Strike |
|
Movement PvP |
Forced March |
|
Control/pressure |
Terrifying Nemesis |
|
Tank |
Shield of the Front or Iron Shield |
Knight Armor Yellows
Use the official Knight Yellow Armor List for the full list.
This section explains what Knight should chase.
[Official guide: Knight Yellow Armor List]
Best yellows by armor part
|
Armor part |
Cast Knight |
Crit Knight |
Tank/PvP Knight |
|
Garb |
Linear Blow, Big Wheel, Dragon Divide |
Triple Slash, Blade Sting, Strike of Death |
Shield Bash, Stun Shock, Hook |
|
Gauntlets |
Power Blade, Brute Force |
Speed Attack, Power Blade, Brute Force |
Faith Defender, Stun Protection |
|
Greaves |
Spirit Shield, Sprint |
Sprint, Razor Sharp |
Resistance, Immortal Calling, Spirit Shield, Bellow |
|
Boots |
Supreme Damage, Health Burst |
Supreme Damage, Health Burst |
Defense Hold, Health Burst, Spirit Snap |
|
Helmet |
Intellect, Mind Boost, Endurance |
Power Surge, Nimbleness, Endurance |
Endurance |
Armor Progression
Knight armor progression:
-
Level-up reward armor
-
Better socketed armor
-
Ancient Armor with useful yellows
-
Heaven’s Hell armor
-
Nightfall Armor
[Official guide: Armor Refinery / Reroll]
[Official guide: Heaven’s Hell Armors]
[Official guide: Nightfall Armor Set]
Nightfall Armor for Knight
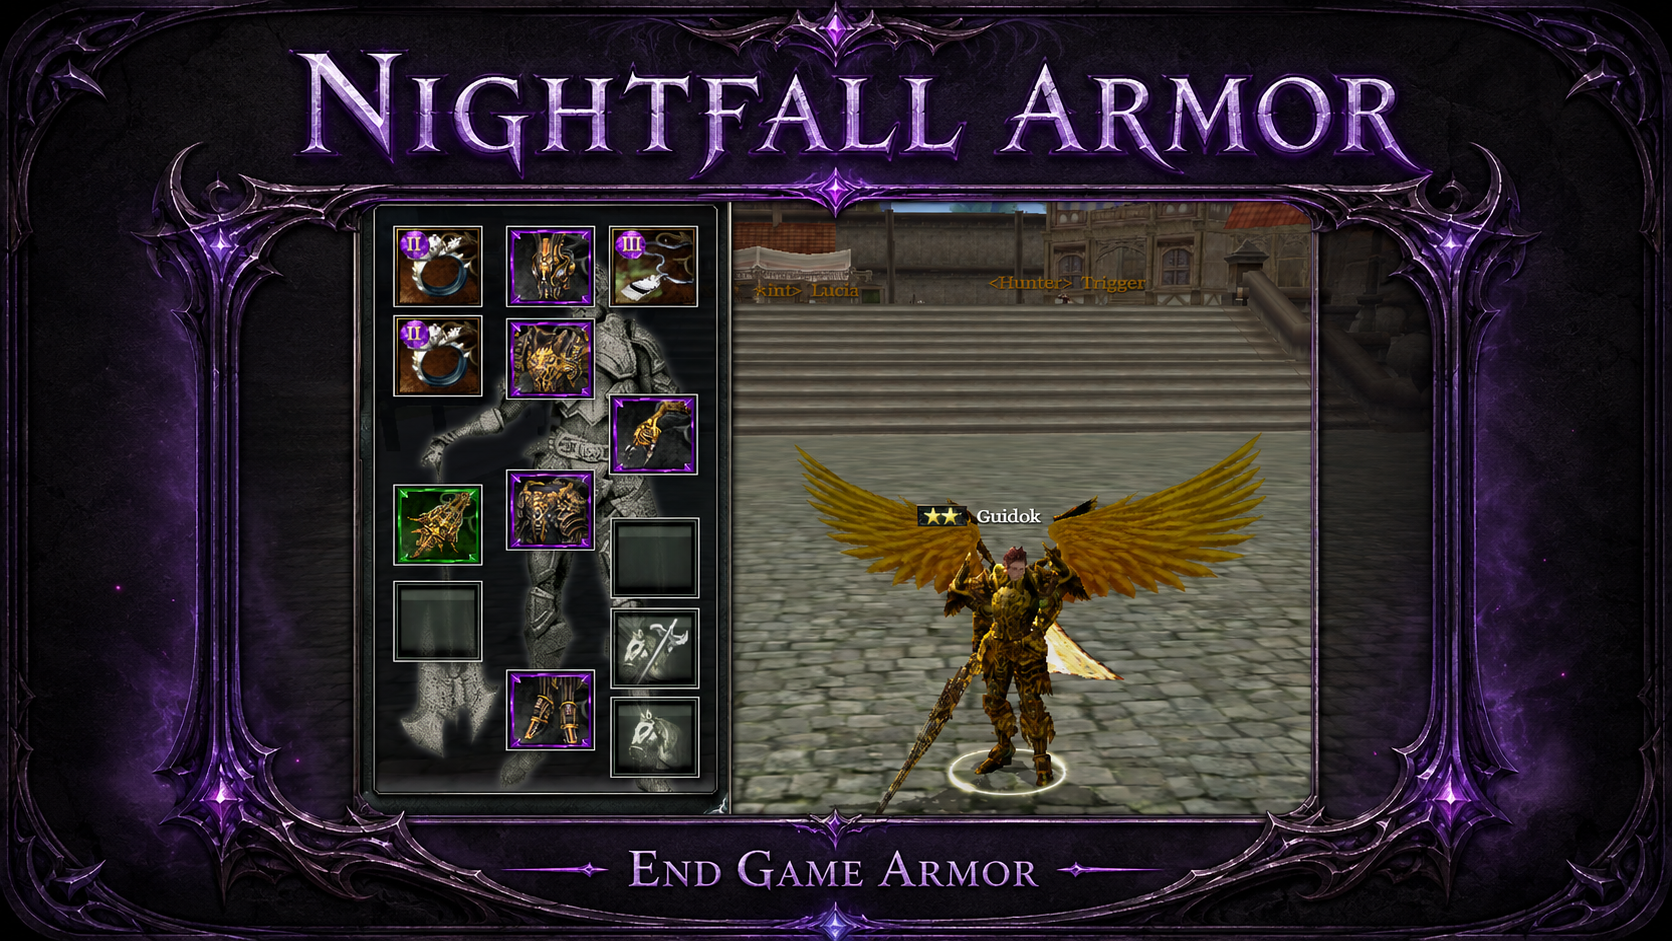
Nightfall Armor is a major endgame upgrade.
Required materials:
|
Material |
Amount |
|
Black Star Shard |
150 |
|
NightFall Core |
20 |
|
Heaven’s Hell Armor |
1 |
|
Gold |
200,000,000 |
Important Knight note:
Nightfall keeps the original armor setup, including stones, yellows, reinforcement level, and slot count. It then adds 2 random bonus stats.
Do not upgrade a bad HH armor piece unless you are ready to keep its yellows and slots.
Best Nightfall Bonus Stats for Knight
|
Armor part |
Best Knight stats |
|
Helmet |
All Stats, Critical Hit Resistance, HH Effect Duration Reduction, Debuff Duration Reduction |
|
Chestpiece |
Damage Taken Reduction, Buff Duration Increase, Defense |
|
Armpads |
Attack Speed Tenacity, Casting Speed Tenacity, Block Debuff Efficiency, Evade/Dodge Debuff Efficiency |
|
Greaves |
Max HP, Skill Cast Debuff Efficiency, Move Speed Debuff Efficiency, Attack Speed Debuff Efficiency |
|
Boots |
Dodge, Evade, Decrease Stun Duration, Slow Duration Reduction, Movement Speed Tenacity |
Best simple rolls:
|
Build |
Best focus |
|
Cast Knight |
Casting Speed Tenacity, Max HP, Skill Cast Debuff Efficiency |
|
Crit Knight |
Attack Speed Tenacity, Max HP, Decrease Stun Duration |
|
Tank Knight |
Damage Taken Reduction, Critical Hit Resistance, Max HP, Dodge, Evade |
|
PvP Knight |
HH Effect Duration Reduction, Stun Duration Reduction, Slow Duration Reduction |
Oreads for Knight
Use the official Oreads guide for full upgrade and Elixir details.
[Official guide: Oreads and Elixirs]
Best Oreads by Knight build
|
Oread |
Best Knight use |
|
Cynsoura |
Cast Knight |
|
Helike |
Crit Knight |
|
Ida |
Tank against cast damage |
|
Adrasteia |
Tank against physical and critical damage |
|
Oenone |
Party support Knight |
Cynsoura
Use for Cast Knight.
Best random sub-stats:
-
All Elemental Attacks
-
Heroic Damage
-
All Stats
-
Reduces skill cast time
-
Reduces skill cooldown time
-
Ignore Skill Block Rate
-
Increase debuff duration
Helike
Use for Crit Knight.
Best random sub-stats:
-
Damage
-
Heroic Damage
-
Attack Rating
-
All Stats
-
Attack Speed
-
On-hit critical strike
-
Ignore Defense
-
Ignore Block and Dodge Rate
-
Ignore Critical Hit Resistance
Ida
Use when cast or skill damage is the main danger.
Best random sub-stats:
-
All Stats
-
Skill Block related stats
-
Physical Resistance related stats
-
Ignore Stun Resistance
-
Debuff duration options if you use control
Adrasteia
Use when physical or critical damage is the main danger.
Best random sub-stats:
-
All Stats
-
Block/Dodge related stats
-
Physical Resistance related stats
-
Ignore Stun Resistance
-
Defensive sub-stats
Oenone
Use only for party support Knight.
Most solo Knights should use Cynsoura, Helike, Ida, or Adrasteia.
Firmament and Endgame Materials
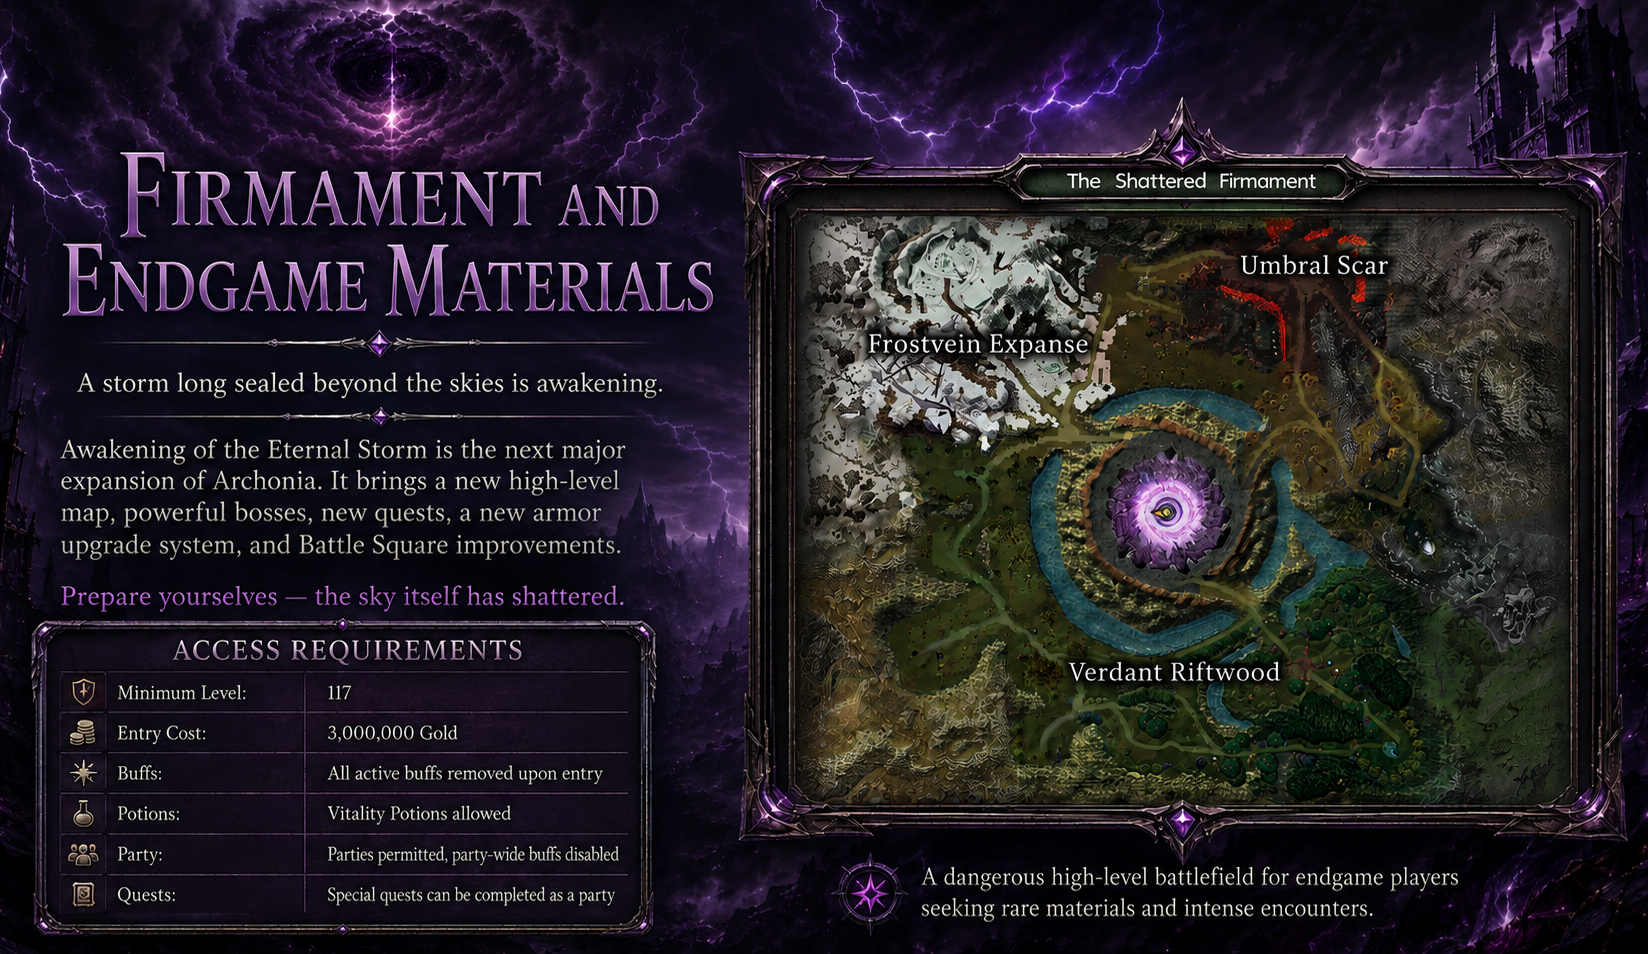
The Shattered Firmament is level 117+ endgame content.
Use the official pages for map rules, quests, boss schedule, and materials.
[Official guide: Awakening General Information]
[Official guide: Materials]
[Official guide: Boss Schedule]
[Official guide: Quests]
Important Knight preparation:
|
Setup |
When to use |
|
Cast Set |
Skill farming if you survive |
|
Crit Set |
Crit splash farming if your gear is strong |
|
Tank Set |
When monsters or bosses hit too hard |
|
Buff Set |
Before fights |
|
Cynsoura |
Cast damage |
|
Helike |
Crit damage |
|
Ida |
Tank vs cast damage |
|
Adrasteia |
Tank vs physical or critical damage |
Important materials:
|
Material |
Why Knight needs it |
|
Black Star Shard |
Nightfall Armor and Oread upgrades |
|
Nightfall Core |
Nightfall Armor and Oread upgrades |
|
Celestial Foci |
Endgame boss material |
Rifts for Knight
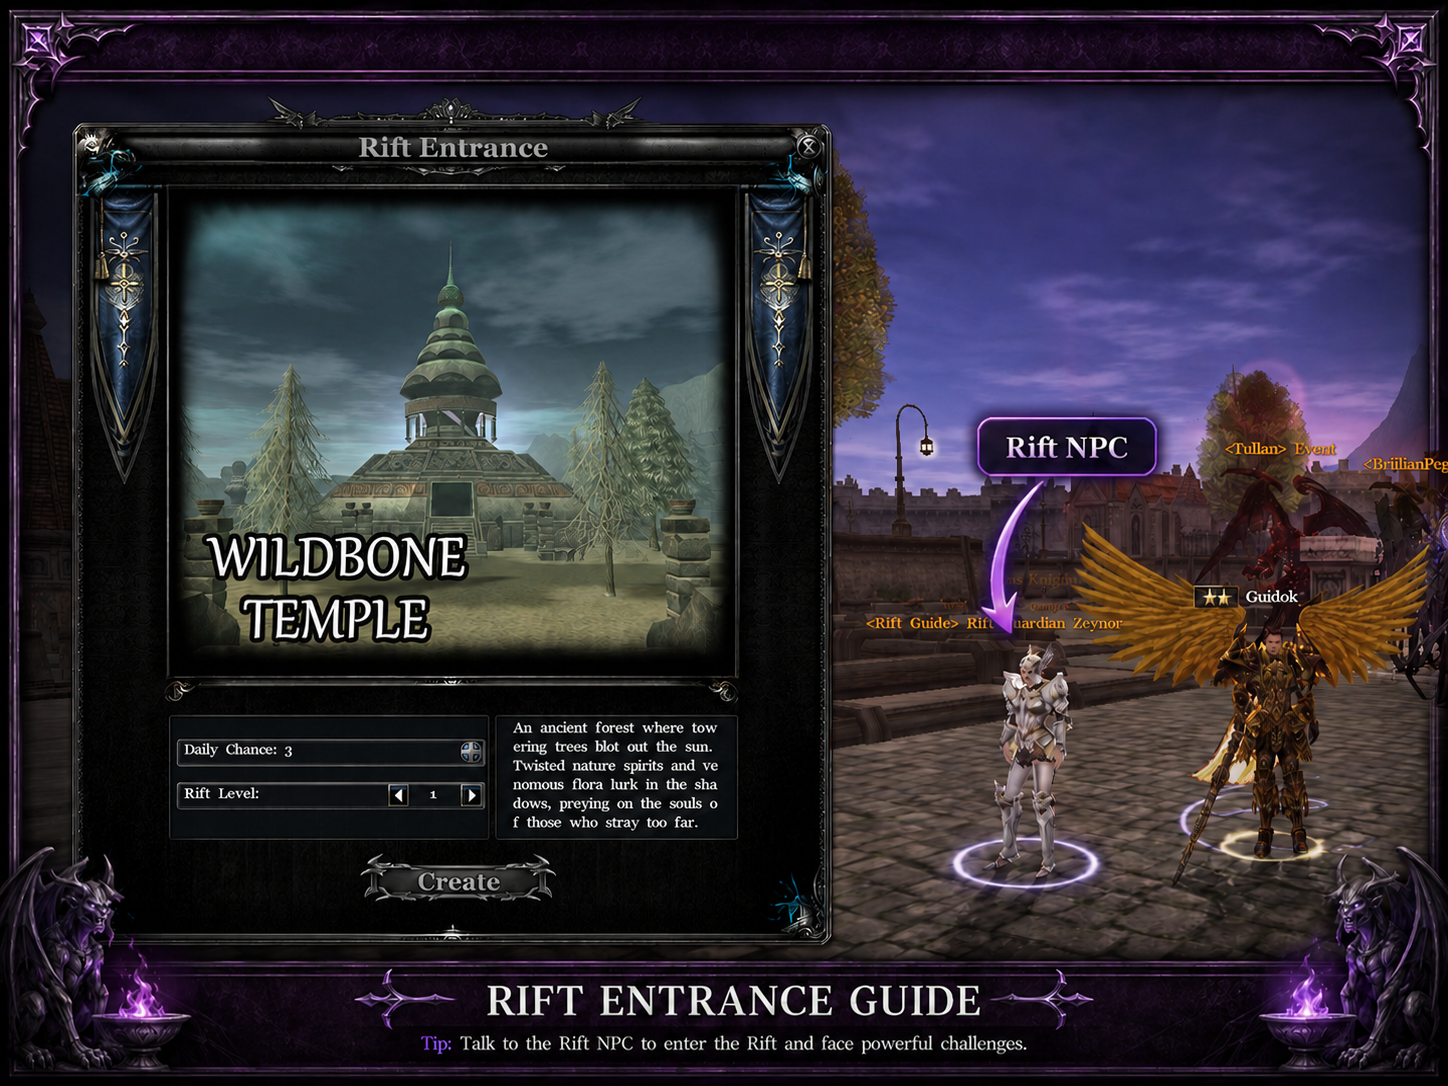
Rifts are useful after level 106.
Use the official Rift guide for full rules and rewards.
Knight note:
|
Knight type |
Rift use |
|
Cast Knight |
Good for clearing monster packs |
|
Crit Knight |
Good if your crit splash and attack speed are strong |
|
Tank Knight |
Good for higher difficulty and safer clears |
Use Rifts to test your damage, survival, and gear switching.
Macro Manager and Gear Switch for Knight
Use the official Macro Manager guide for full technical details.
This section only explains what Knight needs.
[Official guide: Macro Manager]
Knight needs Macro Manager because you should switch between:
-
Damage gear
-
Tank gear
-
Buff gear
-
PvP gear
-
Boss gear
Best Knight switches
|
Switch |
Set A |
Set B |
Use |
|
Damage ↔ Tank |
Cast or Crit damage gear |
Tank gear |
Farming, bosses, PvP |
|
Buff ↔ Fight |
+skill rank gear |
Damage or tank gear |
Before hard fights |
|
Cast ↔ Tank |
Cast gear |
Tank gear |
Cast Knight safety |
|
Crit ↔ Tank |
Crit gear |
Tank gear |
Crit Knight safety |
|
Boss Damage ↔ Boss Tank |
Boss damage gear |
Boss tank gear |
Firmament and bosses |
Important rules:
-
Keep at least 10 free inventory slots.
-
Gear Switch does not swap Oreads.
-
Equip the correct Oread before combat.
-
Gear Switch does not swap cosmetic/avatar slots, mount, or lancer.
-
Do not spam switches while one switch is still running.
Best Knight macros
|
Macro |
Best mode |
Use |
|
PvE Farm |
Toggle |
Farming rotation |
|
Buffs |
Run Once |
Cast buffs once before fight |
|
Potions |
Toggle or Run Once |
Keep items active |
|
PvP Control |
Hold or Run Once |
Short PvP sequence |
|
Boss |
Run Once |
Boss burst or emergency use |
Simple beginner setup
Start with only this:
-
PvE farming macro
-
Buff macro
-
Damage ↔ Tank switch
-
Buff ↔ Fight switch
Add PvP and boss profiles later.
Best Final Setups
Cast Leveling Setup
Use if you want skill farming.
|
Slot |
Setup |
|
Rings |
Intelligent Ohkeros, Yalquninas, Feathered |
|
Necklace |
Intelligent Luke or Intelligent Faren |
|
Oread |
Cynsoura |
|
Stones |
Fragment of Ashtal |
|
Title focus |
Defence Breaker, Health Burst, Strike of Judgement, Righteous Smite |
|
Gear switch |
Cast ↔ Tank |
Crit Splash Leveling Setup
Use if you want faster physical farming.
|
Slot |
Setup |
|
Rings |
Glorious Logo, Glorious Ohkeros, Glorious Bellos, Glorious Feathered |
|
Necklace |
Glorious Hwaridun, Glorious Werewolf, Glorious Faren |
|
Oread |
Helike |
|
Stones |
Lv6 Might Prayer Stone |
|
Title focus |
Sprint, Defence Breaker, Forced March, Inexorable Strike |
|
Gear switch |
Crit ↔ Tank |
Tank Setup
Use for bosses, PvP, and hard zones.
|
Slot |
Setup |
|
Rings |
Excellent Gadius, Sentinel, Excellent Feathered |
|
Necklace |
Excellent Norgen, Werewolf, Excellent Faren |
|
Oread |
Ida or Adrasteia |
|
Stones |
Lv6 Stamina Prayer Stone |
|
Title focus |
Health Burst, Solidarity, Shield of the Front, Iron Shield |
|
Gear switch |
Tank ↔ Damage |
Buff Setup
Use before hard fights.
|
Slot |
Setup |
|
Rings |
Excellent rings with +skill rank |
|
Necklace |
Excellent necklace with +skill rank |
|
Best endgame option |
Excellent Faren Necklace |
|
Use |
Buff first, then switch to fight gear |
Final Knight Progression Checklist
Early Game
-
Claim level-up rewards.
-
Activate Lens Stone+.
-
Activate Compound Potion.
-
Activate pet.
-
Unlock Linear Blow.
-
Use early Shuta/Karkaen rewards.
-
Choose Cast or Crit leveling direction.
Mid Game
-
Cast Knight builds Intelligent accessories.
-
Crit Knight builds Glorious accessories.
-
Tank Knight starts Excellent/Gadius/Norgen setup.
-
Improve weapon.
-
Improve stones.
-
Use Asylum and Ice World carefully.
Late Game
-
Build proper unique accessories.
-
Start title progression.
-
Choose Rank 4 skill carefully.
-
Work on armor yellows.
-
Prepare damage and tank sets.
-
Set up Macro Manager.
Endgame
-
Choose Rank 5 skill carefully.
-
Farm Rifts and Firmament.
-
Build Nightfall Armor.
-
Reroll useful Nightfall bonus stats.
-
Build the correct Oread.
-
Keep Cast, Crit, Tank, Buff, and Boss setups ready.
Final Advice
Knight is strong because it can change setups.
Do not build only one version.
A serious Knight should have:
-
Cast setup for skill farming
-
Crit setup for crit splash farming and PvP
-
Tank setup for survival
-
Buff setup for +skill rank
-
Macro and gear switch setup for fast swaps
Cast Knight is a strong leveling path.
Crit Knight is also a real leveling path because of Critical Damage Splash.
Tank Knight is what keeps you alive when content becomes harder.
The best Knight is the one that knows when to swap gear, when to play safe, and when to push damage.
Spot an error or something outdated? Let us know on Discord.